The constant neck and back pain from studying on your laptop is not inevitable; it’s a solvable design problem caused by your device’s core flaw.
- The key is to break the “ergonomic triangle” by separating your screen from your keyboard using items you already own.
- Small, strategic adjustments to height, surface, and lighting have a greater impact than buying an expensive chair.
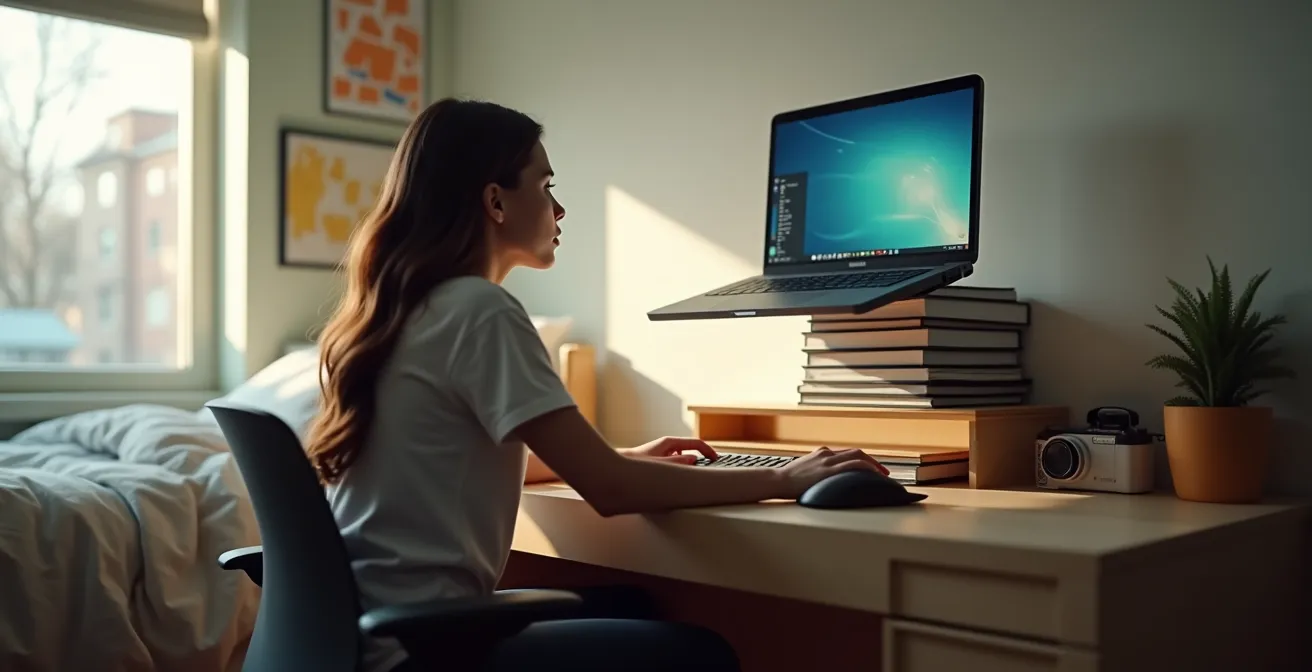
Recommendation: Before spending any money, use a stack of textbooks to raise your laptop screen to eye level and use any spare external keyboard you have. This single change can eliminate most posture-related strain.
That dull ache in your neck after a long study session, the tension headache that creeps in mid-afternoon, the lower back stiffness that makes it hard to get comfortable—as a student health physiotherapist, I see this every day. You might think it’s just a normal part of college life, a price you pay for late-night paper writing. It’s not. This discomfort is a classic case of what we call “biomechanical debt,” the cumulative strain your body accrues from a poorly designed workspace. Most advice online will tell you to buy an expensive ergonomic chair or a fancy standing desk, which is simply not practical for a cramped and budget-conscious dorm room.
The truth is, the laptop itself is the culprit. Its design, with the screen and keyboard fused together, is an ergonomic disaster, forcing you into a hunched position that puts immense pressure on your spine. But here’s the secret the expensive furniture companies won’t tell you: you don’t need a total overhaul. The key to a pain-free setup lies in understanding the “ergonomic triangle”—the relationship between your eyes, your hands, and your posture—and making a few strategic, low-cost micro-adjustments.
This guide will walk you through fixing that broken triangle. We’ll move beyond the generic advice and give you actionable, physio-approved strategies to transform your desk into an ergonomic haven without breaking the bank. We’ll cover everything from ideal screen height and keyboard choices to the hidden performance costs of working on your bed, ensuring you can focus on your studies, not on your pain.
Summary: A Physiotherapist’s Blueprint for a Pain-Free Dorm Desk
- Why Working Directly on a Laptop Screen Causes Neck Pain Within 3 Weeks?
- Why Raising Your Screen 6 Inches Can Eliminate Tension Headaches?
- 60% or TKL: Which Keyboard Saves Space Without Sacrificing Typing Speed?
- The Posture Mistake of Using a Laptop on Soft Surfaces Without a Tray
- Software or Glasses: What Actually Helps You Sleep After Late-Night Papers?
- How to Choose a Portable Monitor That Doesn’t Drain Your Laptop Battery?
- Kensington Lock or Safe: How to Secure Your Laptop in a Shared Dorm?
- NVMe or SATA SSD: Which Is Necessary for Smooth 4K Video Editing?
Why Working Directly on a Laptop Screen Causes Neck Pain Within 3 Weeks?
The fundamental ergonomic flaw of any laptop is that the screen and keyboard are fixed together. This forces you to make a choice: either you position the keyboard comfortably for your hands, which means the screen is too low for your eyes, or you position the screen at eye level, making the keyboard awkwardly high. Inevitably, you drop your head to see the screen, creating what’s known as “tech neck” or forward head posture. This isn’t a minor issue; a differential patterns study found that 53% of college students report musculoskeletal discomfort directly from laptop use.
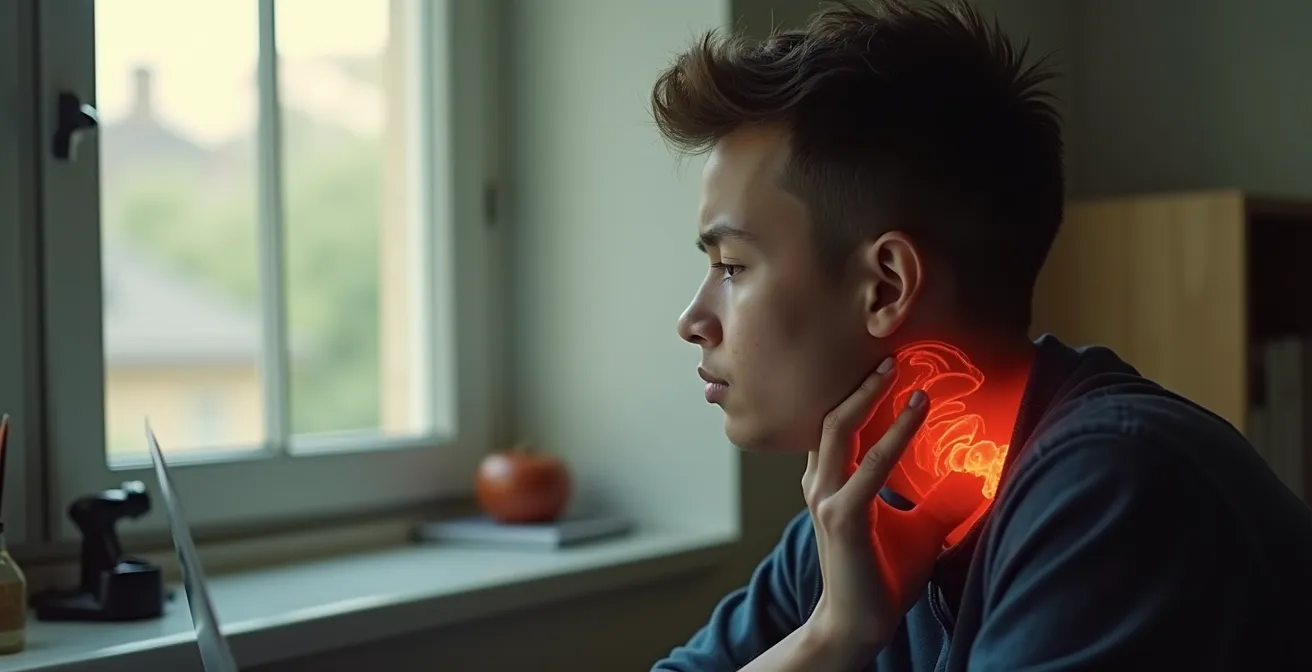
This constant forward tilt accumulates significant “biomechanical debt” on your cervical spine. The muscles in the back of your neck are forced into a constant state of tension to hold your head up against gravity, leading to strain, fatigue, and eventually, chronic pain and tension headaches. The physics are unforgiving, as physiotherapist Dr. Catherine Lutsey explains:
For every inch your head moves forward, it adds about 10 pounds of pressure on your neck. A 3-inch forward tilt is like having a bowling ball hanging from your head.
– Dr. Catherine Lutsey, Spine Health – 10 Best Ergonomic Laptop Setup Tips
Within just a few weeks of consistent study sessions in this posture, the strain can become a persistent problem. The solution isn’t to get rid of your laptop; it’s to break it apart into a more functional, two-part system.
Why Raising Your Screen 6 Inches Can Eliminate Tension Headaches?
The single most effective change you can make to your dorm room setup is elevating your laptop screen. By raising the screen so the top of it is at or just below eye level, you allow your head to return to a neutral position, stacked directly over your spine. This immediately releases the chronic tension in your neck and shoulder muscles—the very tension that triggers many tension headaches. The problem is widespread; research published in Medicine journal shows that 62.7% of students experienced neck pain during periods of intense online learning, much of it attributable to poor screen height.
Raising your screen by just a few inches realigns your entire upper body. It prevents your shoulders from rounding forward and your upper back from hunching. This improved posture not only alleviates pain but also opens up your chest, allowing for deeper, less restricted breathing, which can improve focus and reduce fatigue during long study hours. You don’t need to buy a fancy, expensive stand to achieve this. Your dorm room is already full of solutions.
Action Plan: Achieve Perfect Screen Height on a Budget
- Find your height: Sit up straight and look directly forward. The top of your laptop screen should be at this level. Use a ruler to measure the gap.
- Use a textbook stack: The classic, no-cost solution. Use sturdy, wide textbooks to create a stable platform for your laptop.
- Repurpose a box: An old shoebox or delivery box can work perfectly as a lightweight, temporary stand.
- Invest in a stand: If you have a small budget, a simple, foldable laptop stand is a great investment for both your desk and for taking to the library.
- Position for distance: Ensure the elevated screen is about an arm’s length away from your eyes to prevent eye strain.
Of course, elevating your laptop makes its built-in keyboard unusable. This is not a bug; it’s a feature of a truly ergonomic setup. It forces you to take the next crucial step: adding an external keyboard.
60% or TKL: Which Keyboard Saves Space Without Sacrificing Typing Speed?
Once your laptop is elevated, you need an external keyboard. This is the second half of fixing the “ergonomic triangle,” allowing your hands and wrists to rest in a neutral, comfortable position while your eyes are looking straight ahead. On a cramped dorm desk, however, a full-sized keyboard with a number pad is often too bulky. This is where compact keyboards, like 60% and TKL (Tenkeyless) models, become essential tools for saving space without compromising your typing.
A TKL keyboard is simply a standard keyboard with the number pad chopped off, making it about 20% smaller. A 60% keyboard goes further, removing the function row (F1-F12), arrow keys, and the navigation cluster (Home, End, etc.). These functions are still accessible through a combination of the ‘Fn’ key and other keys. The choice between them depends heavily on your major and workflow.
This comparative table breaks down the key differences to help you choose the right fit for your limited desk space and academic needs, a decision analyzed in dorm room layout guides.
| Feature | 60% Keyboard | TKL (Tenkeyless) |
|---|---|---|
| Size | 12-13 inches wide | 14-15 inches wide |
| Keys Removed | F-row, arrows, navigation | Numpad only |
| Best For | Humanities, writing-focused | CS, finance, STEM majors |
| Space Savings | Maximum (40% smaller) | Moderate (20% smaller) |
| Learning Curve | Steep (function layers) | Minimal |
For most students primarily writing essays, a 60% keyboard offers the most space-saving benefit, leaving ample room for a mouse and notepad. For students in STEM fields who frequently use arrow keys for coding or function keys for shortcuts, a TKL keyboard provides a much easier transition with a minimal learning curve while still saving significant desk real estate.
The Posture Mistake of Using a Laptop on Soft Surfaces Without a Tray
It’s tempting to get comfortable and work from your bed or couch, but this is one of the worst habits for both your posture and your laptop’s health. Soft, uneven surfaces like a mattress or duvet cause your body to sink into an unsupported slump. Your spine rounds, your pelvis tilts backward, and you inevitably end up with the laptop either too close to your face or too low in your lap, exacerbating tech neck. This unstable posture forces your core and back muscles into a constant, low-grade battle to keep you upright, leading to fatigue and pain.
Beyond the postural problems, there’s a hidden technical cost we can call the “ventilation penalty.” Laptops rely on air vents, usually on the bottom and sides, to cool their internal components. When you place your device on a soft surface like a blanket, these vents become blocked. The trapped heat can cause the system to “thermal throttle”—a safety mechanism where the processor intentionally slows down to prevent overheating. This makes your laptop sluggish and unresponsive, adding frustration to your physical discomfort.
Case Study: The Ventilation Penalty in Action
As detailed in research on laptop supports, placing a laptop directly on a bed can obstruct ventilation and lead to significant overheating. When a laptop’s components get too hot, its performance is automatically reduced to prevent damage. This “thermal throttling” creates user frustration that often compounds poor posture as you lean closer to a slow, lagging screen. The study found that using a simple, rigid lap desk or tray with proper ventilation can prevent these temperature increases by up to 15°C, maintaining both ergonomic positioning and peak device performance.
If you must work away from your desk, the solution is simple and inexpensive: use a lap desk. A rigid, flat tray creates a stable mini-desk for your lap, ensuring proper airflow for your laptop and providing a solid surface that encourages better posture than a soft, sinking comforter.
Software or Glasses: What Actually Helps You Sleep After Late-Night Papers?
The ergonomic battle isn’t just physical; it’s also physiological. Staring at a screen late at night exposes your eyes to high-intensity blue light, which tricks your brain into thinking it’s still daytime. This suppresses the production of melatonin, the hormone that regulates your sleep-wake cycle, making it harder to fall asleep and reducing the quality of the sleep you do get. With recent university research revealing that 67.2% of students spend over five hours daily on their phones alone, a proactive approach to managing blue light is critical for academic success.
Two popular solutions are software and blue light-blocking glasses. Software like Apple’s Night Shift or the app f.lux automatically shifts your screen’s color temperature toward a warmer, amber hue after sunset. This is a good first step and is completely free. However, it only addresses the light from that one screen, not the blue light from your phone, your tablet, or the bright overhead lighting in your dorm.
Blue light-blocking glasses offer a more comprehensive solution, filtering blue light from all sources. But the most effective strategy isn’t about one tool; it’s about building a behavioral routine. Creating a “digital sunset” an hour or two before bed sends a powerful signal to your brain that it’s time to wind down. This routine is more powerful than any single piece of tech.
- Enable night mode or f.lux on all your devices to automatically warm the screen color two hours before your planned bedtime.
- Take regular eye breaks every 30-60 minutes. Use the 20-20-20 rule: look at something 20 feet away for 20 seconds.
- During breaks, get up and do a few simple stretches. There are many free apps that offer desk worker stretching exercises.
- Establish a device-free zone. Your bed should be for sleeping only, not for last-minute scrolling. Keep your phone charging across the room.
Combining a software solution with a conscious routine will do more for your sleep quality than glasses alone, ensuring you wake up rested and ready for your morning classes.
How to Choose a Portable Monitor That Doesn’t Drain Your Laptop Battery?
For students who do a lot of research, coding, or writing, a second screen can be a game-changer for productivity. It allows you to have your research open on one screen while you write on the other, eliminating the constant switching between windows. However, adding a bulky desktop monitor to a tiny dorm desk is often impossible. This is where portable monitors shine, offering a lightweight, slim-profile second screen. The main concern, however, is power: a second monitor that quickly drains your laptop battery is more trouble than it’s worth.
Case Study: A Student’s Budget-Friendly Dual-Screen Setup
One student documented their transformation after adding a second monitor. They found a used 22-inch Dell monitor with a USB-C connection for under $100. This single cable from their MacBook both powered the monitor and sent the video signal, creating a clean, one-plug setup. They reported that this simple addition improved their multitasking efficiency by an estimated 40% during online classes and research sessions, while the monitor was still portable enough to take to the library if needed.
The key to a seamless experience is choosing a monitor with the right connection. Modern portable monitors that use a single USB-C cable for both power and video are the gold standard. This one-cable solution is incredibly convenient, but you must ensure your laptop’s USB-C port supports “DisplayPort Alternate Mode” and “Power Delivery.” Older laptops without this feature may require a monitor with its own power source or one that can run on lower power via a standard USB-A connection, though performance may be limited.
- Check for USB-C with Power Delivery: This is the ideal single-cable solution. Look for monitors that specifically advertise this feature.
- Verify your laptop’s ports: Laptops with Thunderbolt 4 or USB4 ports are guaranteed to support this.
- Use your tablet: Apps like Duet Display or Apple’s Sidecar can turn an iPad or Android tablet you already own into a highly efficient second monitor.
- Choose LED over LCD: LED-backlit displays generally consume less power, extending your laptop’s battery life when you’re away from an outlet.
A second monitor is an ergonomic upgrade that boosts both comfort and productivity, allowing you to keep your primary, elevated laptop screen for viewing and the second screen for auxiliary tasks.
Kensington Lock or Safe: How to Secure Your Laptop in a Shared Dorm?
Ergonomics and productivity are pointless if your laptop gets stolen. In a shared living space like a dorm, physical security is not paranoia; it’s a necessity. While you should always have strong passwords and encrypted data, preventing the device from physically walking away is the first line of defense. The two most common physical security solutions are the classic Kensington lock and a small laptop safe.
A Kensington lock is a cable that tethers your laptop to a heavy, immovable object like a desk. It’s an excellent deterrent against opportunistic, “grab-and-go” theft. A laptop safe provides a higher level of security but is less convenient, as you have to store the laptop away every time you leave. For most students, a combination approach is most effective: using a cable lock for daily security when you’re just stepping out for a moment, and leveraging digital tools for added protection.
This table compares the most common physical and digital security methods to help you decide on the best strategy for your dorm room environment.
| Security Type | Method | Cost | Effectiveness |
|---|---|---|---|
| Physical | Kensington Lock | $15-40 | High for opportunistic theft |
| Physical | Laptop Safe | $50-150 | Very high but less convenient |
| Digital | Dynamic Lock (Windows) | Free | Medium – auto-locks when away |
| Digital | VPN for Wi-Fi | $3-10/month | Essential for data protection |
Before buying a lock, verify the type of security slot your laptop has (the standard Kensington, the smaller Nano, or another variant) as an incompatible lock is a common and frustrating waste of money. Furthermore, never underestimate digital security. Using a VPN is essential to protect your data when using insecure campus Wi-Fi, and features like Windows Dynamic Lock (which automatically locks your PC when your Bluetooth-paired phone goes out of range) add a convenient layer of security.
Key Takeaways
- The root cause of “tech neck” is the laptop’s design; the solution is to separate the screen and keyboard.
- Low-cost adjustments like using textbooks as a stand and adding an external keyboard are more effective than buying expensive furniture.
- Poor ergonomics have hidden costs, including device overheating from blocked vents and poor sleep from unmanaged blue light.
NVMe or SATA SSD: Which Is Necessary for Smooth 4K Video Editing?
For the general student population, any modern Solid-State Drive (SSD) is more than fast enough for writing papers and browsing the web. However, for students in creative fields like film, animation, or design who work with large files like 4K video, the type of internal storage can become a significant performance bottleneck. The two main types of SSDs are SATA and NVMe, and their speed differences are dramatic.
SATA SSDs are the older standard, with speeds topping out around 550 MB/s. They are perfectly adequate for general use and even light video editing. NVMe (Non-Volatile Memory Express) SSDs are a modern protocol that communicates directly with the computer’s processor, offering staggering speeds of 3,500 MB/s or more—over six times faster than SATA. This speed is crucial when “scrubbing” through 4K video timelines or rendering complex effects.
This table breaks down the performance characteristics of different storage types to clarify what is truly necessary for a smooth 4K editing workflow.
| Storage Type | Read Speed | Heat Generation | Price/GB | 4K Editing |
|---|---|---|---|---|
| External HDD | 120 MB/s | Low | $0.02 | Unsuitable |
| SATA SSD | 550 MB/s | Low | $0.08 | Adequate |
| NVMe SSD | 3,500 MB/s | High | $0.12 | Optimal |
| External NVMe | 1,000 MB/s | Medium | $0.15 | Good |
While an internal NVMe drive is optimal for performance, it’s not always the most practical or cost-effective solution for a student. In many cases, the bottleneck isn’t the drive itself, but the workflow. This is where a more holistic view becomes important.
For many students, reliable dorm Wi-Fi or a 5G mobile hotspot for editing with cloud-based proxies can be more impactful for a smooth workflow than the internal SATA vs. NVMe debate.
– Eureka Ergonomic Research Team, Gaming Desk Layout Ideas for Small Dorm Rooms
This insight is crucial. Investing in faster Wi-Fi or a better cloud storage plan to work with smaller “proxy” files might provide a smoother editing experience than simply upgrading the internal drive. It’s about finding the smartest solution, not just the fastest hardware.
Ultimately, creating a pain-free and productive laptop setup in your dorm is about making smart, informed choices rather than expensive purchases. By applying these ergonomic principles, you are investing directly in your health, focus, and academic success. Start with these small adjustments today to build a foundation for healthier work habits that will last long after graduation.