The biggest mistake sailors make with satellite internet isn’t choosing the wrong plan; it’s failing to master the physical installation, leading to system failure from corrosion, power drain, or interference.
- Reliable offshore connectivity depends on a robust installation that anticipates the harsh marine environment, especially waterproofing connections and managing power.
- Strategic placement of antennas is non-negotiable to avoid signal degradation or equipment damage from your boat’s own radar and radio systems.
Recommendation: Treat your satellite internet as a complete onboard system, not just a dish. Focus 80% of your effort on power integrity, corrosion-proofing, and interference mitigation for a truly dependable link to shore.
The promise of staying connected while cresting a wave 100 miles from the nearest shoreline is no longer science fiction. For the modern sailor, it’s about downloading critical weather GRIB files, holding a video call with family, or managing business from the middle of the Atlantic. Many conversations start and end with a simple comparison of providers like Starlink, Viasat, or Iridium. The brochures are glossy, and the advertised speeds are tempting, leading many boat owners to believe the challenge is purely a financial or subscription-based one.
But as a marine electronics installer, I see a different reality at the dock. The most expensive, top-of-the-line satellite system is only as good as its weakest link. The real battle for connectivity at sea isn’t fought on a comparison website; it’s fought against the insidious creep of salt spray into a poorly sealed connector, the silent drain of a power-hungry terminal on your house battery, and the invisible war of radio frequencies waged between your radar and your satellite dish. These are the details that the manuals often gloss over but are the absolute bedrock of a reliable system.
This guide bypasses the superficial sales pitch. We’re going to pull back the curtain on what it truly takes to build a resilient offshore communications hub. We’ll move beyond the ‘what to buy’ and dive deep into the ‘how to install it so it doesn’t fail’. This is the installer’s perspective, focused on system integrity, power budgeting, and creating a layered safety net that will keep you connected when it matters most. We will dissect the technical choices, the critical installation steps, and the operational best practices that turn a satellite dish into a dependable lifeline.
To navigate this complex but crucial topic, we’ve structured this guide to address the key challenges an installer tackles, from the fundamental technology choice to the fine-tuning that ensures your system endures a long voyage. Here is what we’ll cover.
Summary: A Practical Guide to Installing and Maintaining Satellite Internet at Sea
- GEO vs. LEO Satellites: Which Is Better for Video Calls at Sea?
- How to Waterproof Your Satellite Dish Connections Against Salt Spray?
- How to Run a Satellite Terminal Without Draining Your Boat’s House Battery?
- The Mounting Mistake That Fries Your Satellite Gear with Radar Interference
- How to Link Your Satellite Wi-Fi to Global Rescue Services?
- How to Convert Starlink to 12V DC to Save 20% Energy Boondocking?
- How to Configure Tracker Ping Rates to Last for a 60-Day Sea Voyage?
- Starlink on a Boat: How to Overcome Mast and Rigging Obstructions?
GEO vs. LEO Satellites: Which Is Better for Video Calls at Sea?
When you’re considering satellite internet, the first major decision is the technology: Geostationary (GEO) or Low Earth Orbit (LEO) satellites. For tasks like email or slow-file downloads, both can work. But for real-time communication like a video call, the difference is night and day. The core issue is latency—the time it takes for a signal to travel from your boat to the satellite and back. It’s the digital equivalent of an echo on a phone line.
LEO constellations, like Starlink, orbit much closer to Earth. This proximity dramatically reduces latency. Industry analysis shows a typical delay of just 20-50 milliseconds for LEO vs 500-600 milliseconds for GEO systems. That half-second delay on GEO makes fluid conversation impossible, with constant interruptions and people talking over each other. For a video call, LEO is the undisputed winner, providing a user experience similar to terrestrial broadband. This was proven in a real-world test aboard the Irish research vessel ‘Tom Crean’, which found Starlink’s LEO system offered far superior reliability for remote operations requiring real-time control compared to traditional GEO VSAT.
However, the choice isn’t just about latency. GEO systems, while slower, connect to a single satellite in a fixed position, which can offer very stable connections once locked on. LEO systems require the dish to constantly track and switch between satellites as they fly overhead. While modern systems handle this seamlessly, it introduces more potential points of failure. The following comparison breaks down the key trade-offs an installer considers.
| Feature | LEO (Starlink) | GEO (Viasat/HughesNet) |
|---|---|---|
| Latency | 20-50ms | 500-600ms |
| Download Speed | 100-250 Mbps | 12-100 Mbps |
| Upload Speed | 10-25 Mbps | 1-5 Mbps |
| Monthly Cost | $150-200 (Mobile) | $100-500 (Marine) |
| Hardware Cost | $599-2,500 | $3,000-25,000 |
| Handoff Stability | Frequent switches | Fixed position |
Ultimately, for sailors who prioritize real-time communication and high-speed data, LEO systems are the modern standard. For those needing a simple, lower-data backup system where latency is not a concern, a less expensive GEO plan could suffice, but it will not support a modern connected lifestyle at sea.
How to Waterproof Your Satellite Dish Connections Against Salt Spray?
On a boat, water gets everywhere. But it’s the salt, not just the water, that is the true enemy of electronics. Saltwater is highly conductive and brutally corrosive. A single drop in the wrong place can create a short circuit or begin a corrosive process that eats away at metal connectors, leading to signal degradation and eventual system failure. From an installer’s perspective, this is the most common and preventable cause of satellite internet problems at sea. The factory-supplied weather boots are a starting point, but they are not enough for long-term offshore reliability.
The solution is a multi-layered defense system we call corrosion prophylaxis. It’s not about one magic product, but a methodical process to create a void-free, airtight, and UV-resistant barrier around every single exterior connection. The key is using materials that work together. A high-quality silicone dielectric grease is the first line of defense; it’s non-conductive and displaces air and moisture from the metal contact surfaces. Crucially, marine-grade grease is designed for this environment, with some variants maintaining stability from -55°C to +230°C operating range, ensuring performance in all climates.

As you can see in the detail above, the goal is to create an impermeable seal. After applying grease, the next layer is self-amalgamating tape. When stretched, this tape chemically bonds to itself, forming a solid, seamless rubber sheath. The final, outer layer is a high-quality, UV-resistant electrical tape or heat shrink tubing, which acts as a sacrificial layer, protecting the amalgamating tape from sun and mechanical damage. This three-part system, when done correctly, makes a connection virtually impervious to the marine environment.
Never underestimate the destructive power of salt spray. Taking an extra 15 minutes to properly seal every connection during installation will save you days of frustrating troubleshooting and potentially thousands of dollars in replacement hardware down the line.
How to Run a Satellite Terminal Without Draining Your Boat’s House Battery?
Modern satellite terminals, especially high-performance LEO systems, are power-hungry. They are not like a small chartplotter or VHF radio; they are essentially powerful computers and phased-array antennas that draw a significant and continuous load. A common shock for new users is discovering that Starlink satellite systems typically consume 7 amps continuous draw. Over a 16-hour period, that’s 112 amp-hours—a massive chunk of the usable capacity of a typical sailboat’s battery bank.
Leaving the system on 24/7 without a proper power management strategy is the fastest way to a dead house battery, which can be a critical safety issue offshore. The solution lies in strategic power budgeting. You must treat your satellite internet’s power consumption as a line item in your daily energy calculations, just like your refrigerator or autopilot. The first step is to know your true capacity. Remember, for standard lead-acid batteries, you should only use about 50% of the rated capacity to preserve their lifespan. An AGM or Lithium bank gives you more usable power, but the principle is the same.
A smart battery monitor is an essential tool, not a luxury. Devices like the Victron Cerbo GX allow you to see your real-time state of charge and, more importantly, program automatic cutoffs. You can set a relay to automatically kill power to the satellite terminal if your battery’s state of charge drops below a safe threshold, for instance, 60%. This acts as a safety net to protect your essential systems. Furthermore, installing a dedicated physical isolation switch is crucial. This allows you to guarantee a true zero-draw when the system is not needed for extended periods, like overnight or on short coastal hops, preventing even small parasitic drains from accumulating over time.
Ultimately, you must shift your mindset from “always on” to “on when needed.” By actively managing its uptime and installing smart safeguards, you can enjoy the benefits of high-speed internet without compromising your boat’s fundamental electrical integrity.
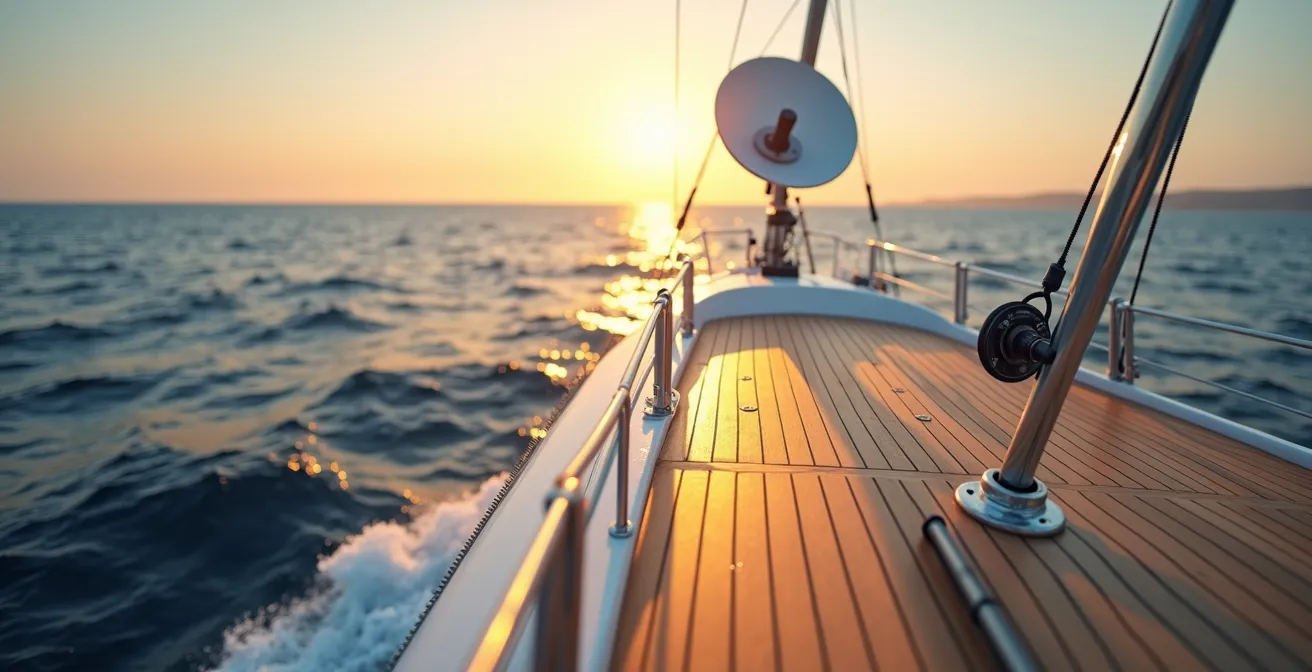
The Mounting Mistake That Fries Your Satellite Gear with Radar Interference
One of the most dangerous and costly mistakes a sailor can make is improper placement of the satellite dome relative to other antennas, especially the radar. It’s an issue of electronic field navigation. Your radar doesn’t just see targets on a screen; it blasts out powerful pulses of microwave energy in a concentrated beam. If your satellite dish is mounted directly in that beam’s path, you’re essentially slow-cooking its sensitive electronics. The result can be intermittent connection drops, permanent performance degradation, or outright equipment failure.
Many boaters assume that just putting some horizontal distance between the units is enough. This is a critical misunderstanding of how radar beams work. Marine electronics specialists have found that vertical separation is exponentially more effective than horizontal. The high-intensity part of a leisure marine radar’s beam is very narrow vertically but wide horizontally.
Case Study: Understanding Radar Interference Zones
Analysis of a typical 4kW leisure radar, common on sailing yachts, shows its interference-causing field can extend up to 3 meters (about 10 feet) horizontally. However, because the beam is so flat, the same field extends only 1 meter (about 3 feet) vertically. This means mounting a satellite dish 2 meters directly above a radar dome is far safer than mounting it 2 meters to the side on the same horizontal plane. Prioritizing vertical clearance is the key to avoiding this “friendly fire” from your own equipment.
This principle applies to other transmitting devices as well, like SSB and VHF radios, though their interference patterns are less destructive than radar. A professional installation involves mapping out these invisible electronic fields and finding a safe haven for the satellite dome. The following table provides a general guideline for minimum safe separation distances.
| Interference Source | Horizontal Safe Distance | Vertical Safe Distance | Shielding Solution |
|---|---|---|---|
| 4kW Radar | 3 meters | 1 meter | Aluminum plate between units |
| SSB Radio (150W) | 2 meters | 0.5 meters | Ferrite cores on cables |
| VHF (25W) | 1 meter | 0.3 meters | Proper grounding |
| Inverter (2000W) | 1.5 meters | 0.5 meters | Shielded cables + ferrites |
Before you drill a single hole, power up your radar and other transmitters to physically map their locations and beam paths. Plan your satellite dish mount with this data in hand. Getting the placement right from the start is infinitely easier than troubleshooting a fried system in the middle of an ocean passage.
How to Link Your Satellite Wi-Fi to Global Rescue Services?
Having high-speed internet offshore feels like a safety revolution. You can video-call a doctor, download detailed charts, and communicate easily. However, it’s a dangerous mistake to make your high-bandwidth Starlink or V-SAT system your *only* link for emergency rescue. These systems are complex, power-hungry, and have multiple points of failure. In a true emergency—a lightning strike, a complete power failure, or a dismasting that takes out your dome—you cannot afford for your SOS link to go down.
The professional approach is to create a layered safety net. Your primary satellite internet is for data and convenience. Your lifeline should be a separate, dedicated, and ideally battery-powered device. This philosophy is echoed by experienced offshore cruisers.
As the experienced sailors and content creators Jason and Nikki of Gone with the Wynns advise in their sailing connectivity guide:
Your primary high-bandwidth sat-fi should not be your primary rescue link. Create a layered safety net: 1) Starlink/V-SAT for high-data needs, 2) A separate, battery-powered Iridium GO! or Garmin inReach for dedicated, fail-safe SOS link
– Gone with the Wynns, Sailing connectivity guide for offshore passages
This creates redundancy. The Iridium GO! or Garmin inReach operates on a different satellite network (Iridium) that is engineered for high reliability and low-power messaging, not high-speed video. It has its own battery and is often portable. It’s your digital flare gun. While you can’t rely on it for web browsing, it is the most dependable way to trigger an SOS and maintain two-way text communication with rescue coordinators. You can even configure your router’s Quality of Service (QoS) settings to prioritize bandwidth for these emergency devices, but physical separation remains the best practice for ultimate safety.
Embrace your high-speed internet for the comfort and information it provides, but never let it lull you into a false sense of security. Your dedicated, independent emergency communicator is the piece of equipment you hope you never have to use, but the one you’ll be most grateful for if you do.
How to Convert Starlink to 12V DC to Save 20% Energy Boondocking?
Most satellite systems, including the standard Starlink kit, are designed to run on AC power (110V/230V). On a boat, this means running an inverter to convert your 12V DC battery power into AC. This process is inherently inefficient. Every time you convert power, you lose some of it as heat. When you’re managing a tight power budget on a long passage, these losses add up quickly. For a power-hungry device like Starlink, this inefficiency can be a significant drain on your batteries.
A popular and highly effective modification for boaters is to bypass the inverter entirely and power the system directly from the boat’s 12V DC supply. This involves using a DC-DC converter to step up your 12V to the voltage required by the satellite terminal (often 48V for Starlink). By eliminating the DC-to-AC-to-DC conversion losses, a direct 12V DC conversion of Starlink can achieve a 15-20% power reduction. Over the course of a week, this can save dozens of amp-hours, extending your off-grid autonomy and reducing engine or generator runtime.
However, this is not a simple plug-and-play modification. It requires a solid understanding of marine electrical systems to be done safely. A poorly executed conversion can create a fire hazard or damage your expensive satellite equipment. The key is using appropriately sized components and incorporating multiple safety features. An undersized converter will overheat, and inadequate fusing can lead to a catastrophic failure. This is a project that should only be undertaken if you are confident in your electrical skills.
Your action plan: Safe DC Conversion Requirements for Marine Starlink
- Select a DC-DC converter rated for 150W continuous output with a 200W surge capability to handle startup loads.
- Include a 15A inline fuse, positioned within 7 inches of the battery connection, to protect the circuit.
- Add a reverse polarity protection diode (a Schottky type is best for lower voltage drop) to prevent damage if wired incorrectly.
- Install a soft-start circuit or an NTC thermistor to manage the high 10-15A inrush current when the system first powers on.
- Mount the converter in a well-ventilated enclosure, ensuring a minimum of 2-inch clearance on all sides for proper airflow and heat dissipation.
If you’re not comfortable with these steps, this is a job best left to a professional marine electronics installer. The energy savings are substantial, but the cost of getting it wrong is far greater.
How to Configure Tracker Ping Rates to Last for a 60-Day Sea Voyage?
For many sailors, a key function of their satellite system is the ability to send automated position reports, or “pings,” to a tracking map that friends and family can follow online. It’s a fantastic way to share your journey and provides peace of mind for those ashore. However, every ping uses a small amount of data and a burst of power. When you’re on a multi-week or multi-month voyage, the cumulative effect of frequent pings can be a significant drain on both your data plan and your battery bank.
The “set it and forget it” approach is inefficient. A smarter strategy is to tailor your ping interval to your specific location and situation. When you’re navigating a busy coastal traffic zone, a higher frequency—say, every 10-30 minutes—makes sense for situational awareness. But when you’re mid-ocean, a thousand miles from anyone, pinging every 10 minutes is unnecessary. Extending the interval to 4 or even 6 hours is perfectly adequate and dramatically reduces data and power consumption over the long haul. This intelligent configuration can be the difference between your tracker lasting for a full 60-day passage or running out of battery or data halfway through.
Modern tracking services and devices often allow for advanced configuration. An expert-level technique is to use automated geofencing. Experienced cruisers program their trackers to automatically change ping rates when entering or leaving defined geographical areas. For instance, you could set a geofence 50 nautical miles around your departure and arrival ports to trigger 10-minute pings, while defaulting to 1-hour pings for the main ocean passage. This automates the optimization process, giving you the best of both worlds: high-frequency tracking where it’s most useful and maximum conservation where it’s not.
The following table, based on cruiser reports, illustrates the dramatic impact that adjusting ping intervals can have on battery life and data costs for a typical satellite tracker.
| Navigation Zone | Ping Interval | Battery Life Impact | Data Cost/Month |
|---|---|---|---|
| Coastal Traffic (0-20nm) | 10-30 minutes | 20 days | $25-40 |
| Offshore Approach (20-200nm) | 1 hour | 45 days | $15-25 |
| Ocean Passage (200nm+) | 4-6 hours | 60+ days | $10-15 |
| Emergency Mode | 5 minutes | 7 days | $80-120 |
Before you cast off, spend time in your tracker’s admin panel. Set up your profiles and geofences. This small bit of preparation on land will pay huge dividends in battery and data savings once you are at sea.
Key Takeaways
- The reliability of offshore satellite internet depends less on the brand and more on the quality of the installation, focusing on waterproofing, power management, and interference avoidance.
- LEO systems like Starlink offer vastly superior performance for real-time uses like video calls due to low latency, but require careful power budgeting.
- A “layered safety net,” combining a high-bandwidth system with a separate, dedicated emergency communicator like an Iridium GO! or Garmin inReach, is the gold standard for offshore safety.
Starlink on a Boat: How to Overcome Mast and Rigging Obstructions?
LEO satellite systems like Starlink achieve their incredible speeds by communicating with a constantly moving constellation of satellites. To do this effectively, the dish—or phased-array antenna—needs a wide, clear view of the sky. The system’s performance is directly tied to its field of view; a partial obstruction doesn’t just slow it down, it can cause frequent connection dropouts. According to the manufacturer, Starlink requires approximately a 100-degree cone of clear sky view for stable operation.
On a sailboat, this presents a unique challenge. Unlike a house or an RV, a boat has a tall mast, sails, and a complex web of rigging—all of which can move and block the signal. Mounting the dish on the cabin top might seem easy, but the mast and boom can create a massive blind spot. This problem is compounded when the boat is heeled over while sailing, as the angle of the mast and sails relative to the dish changes constantly. A spot with a clear view at anchor might be completely blocked when heeled 15 degrees on a port tack.
The solution requires a strategic approach to mounting that considers the boat’s geometry in all conditions. The Starlink mobile app has an obstruction viewer tool which is invaluable. Before committing to a permanent location, you should use this tool to check for obstructions not only at anchor but also by simulating heeling. A common and effective solution is to mount the primary dish on a stern arch or pole mount. This location is often aft of the mast and boom, providing a wide, 270-degree or greater view that is less affected by sailing maneuvers. For ultimate flexibility, some sailors install a secondary rail-mount bracket, allowing them to reposition the dish in tight anchorages where another boat or a cliff face might be causing a blockage. Mast-top mounting is an option for maximum clearance, but the added weight aloft is often a major concern for performance-oriented sailors.
To ensure you get the best performance from your investment, dedicate time to finding the mounting sweet spot. Use the tools available, test in different scenarios, and prioritize a clear view of the sky above all else. A well-placed dish is the final piece of the puzzle for achieving reliable, high-speed internet far from shore.