The key to successful senior telehealth isn’t just technology, but mitigating the clinical risks that arise from a poor remote setup.
- Choosing the right device and lighting directly impacts a doctor’s ability to make an accurate visual diagnosis.
- Securing data through patient portals and ensuring clear audio with connected hearing aids prevents critical information from being lost or compromised.
Recommendation: Before every appointment, run a simple 5-point “pre-flight” tech check to transform a stressful event into a smooth, effective, and safe healthcare experience.
The frustration is palpable. You’re trying to help your aging parent connect to a video appointment, but the audio is crackling, the image is dark, and the login password you wrote down isn’t working. While telehealth has surged in popularity, for many seniors and their caregivers, it has introduced a new layer of stress. The American Psychological Association highlights this gap perfectly: while a study shows that 7 in 10 older adults have the necessary tech, only 11% feel comfortable using it. This discomfort isn’t just an inconvenience; it’s a barrier to effective care.
Many guides offer generic advice like “get a good internet connection” or “be patient.” But from a clinical perspective, these tips fall short. A poor setup can lead to more than just frustration—it can lead to a misdiagnosis, a misunderstanding of treatment instructions, or a missed opportunity to spot a critical health issue. The challenge isn’t just about making the technology work; it’s about ensuring the quality of care isn’t compromised by the distance.
This is where our approach differs. As a geriatric care technology consultant, I see every technical choice as a tool for risk mitigation. This guide moves beyond the basics to focus on the *why* behind each step. We will treat the setup not as an IT problem, but as an integral part of the care plan. The goal is to bridge the sensory gap between the patient and the physician, ensuring diagnostic fidelity and creating a frictionless workflow for your loved one.
We will deconstruct the process into clear, manageable components. From selecting the right screen and connecting hearing aids to mastering lighting and running a “pre-flight” check, you’ll learn how simple, targeted actions can dramatically improve the safety and effectiveness of every remote consultation. This is about empowering you, the caregiver, to create an environment where technology fades into the background, allowing the focus to return to what truly matters: the conversation between a patient and their doctor.
This article provides a structured roadmap to transform your telehealth experience. Follow these sections to build a reliable and safe remote care station, step by step.
Summary: A Consultant’s Guide to Senior Telemedicine Setup
- Tablet or Phone: Which Screen Size Is Safer for Visual Diagnosis Calls?
- How to Connect Hearing Aids to Tablets for Clearer Doctor Consultations?
- Email or Portal: What Is the Safest Way to Send X-Rays to Your Specialist?
- The Lighting Mistake That Can Lead to a Misdiagnosis During a Video Call
- How to Run a “Pre-Flight” Tech Check 15 Minutes Before Your Appointment?
- Why a 10ms Delay Is Too Risky for Remote Surgical Procedures?
- Why Using VoiceOver or TalkBack Reduces Battery Life by 20%?
- How to Configure Accessibility Settings for Seniors with Vision Loss?
Tablet or Phone: Which Screen Size Is Safer for Visual Diagnosis Calls?
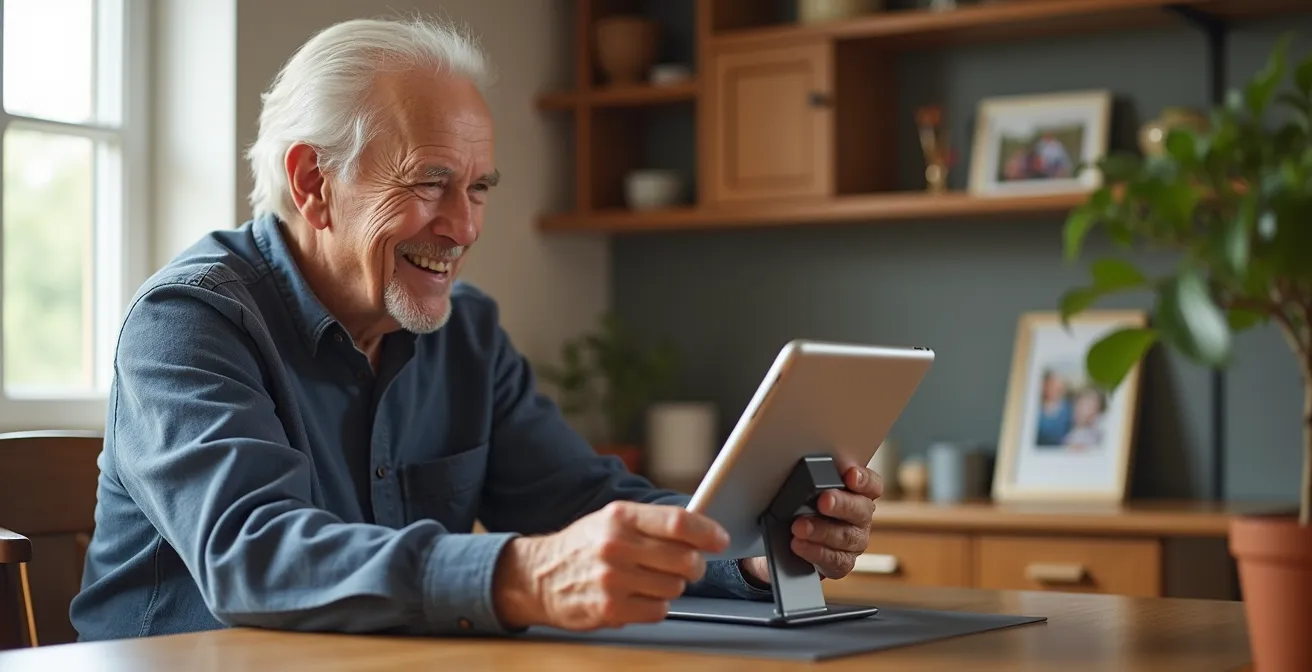
The choice between a tablet and a smartphone for telemedicine isn’t just about convenience; it’s a critical decision that impacts diagnostic fidelity. When a doctor needs to visually assess a condition, such as a skin rash, a swollen joint, or a patient’s facial expressions, the clarity and size of the image are paramount. A smaller phone screen can obscure subtle details, potentially leading to an incomplete assessment. With telehealth becoming a cornerstone of senior care— recent data shows 25% of Medicare fee-for-service users engaged in telehealth—optimizing the visual interface is no longer optional.
For most senior-focused telehealth applications, a tablet is the superior clinical tool. The larger screen, typically 8 to 13 inches, allows for a more detailed view of the patient. More importantly, it provides larger “tap targets” for buttons and on-screen controls, significantly reducing the risk of accidental misclicks that can cause frustration and end a call prematurely. When mounted on a simple stand, a tablet offers a stable, hands-free view, eliminating the shaky image common with handheld phones and allowing the patient to focus on the conversation, not on holding a device steady.
While a smartphone is familiar, its small form factor introduces risks. The limited detail visibility makes it less suitable for any consultation that relies on visual examination. The goal is to bridge the sensory gap, giving the physician the best possible remote view. A tablet, with its larger and more stable picture, is a more robust and safer choice for achieving that goal.
The following table breaks down the key factors to consider when making this choice, framed from a perspective of safety and usability for a senior user.
| Factor | Tablet | Phone |
|---|---|---|
| Screen Size | 8-13 inches | 5-7 inches |
| Tap Target Safety | Larger buttons reduce misclicks | Smaller interface, higher error risk |
| Stability with Stand | Steadier image when mounted | More prone to hand shake |
| Visual Clarity | Better for examining skin conditions | Limited detail visibility |
| Battery Life | 10+ hours typical | 5-8 hours with video calls |
Ultimately, investing in an affordable tablet and stand is one of the most effective upgrades you can make to a senior’s telemedicine station. It directly enhances the quality of care by providing the doctor with a clearer, more stable, and more reliable visual connection to their patient.
How to Connect Hearing Aids to Tablets for Clearer Doctor Consultations?
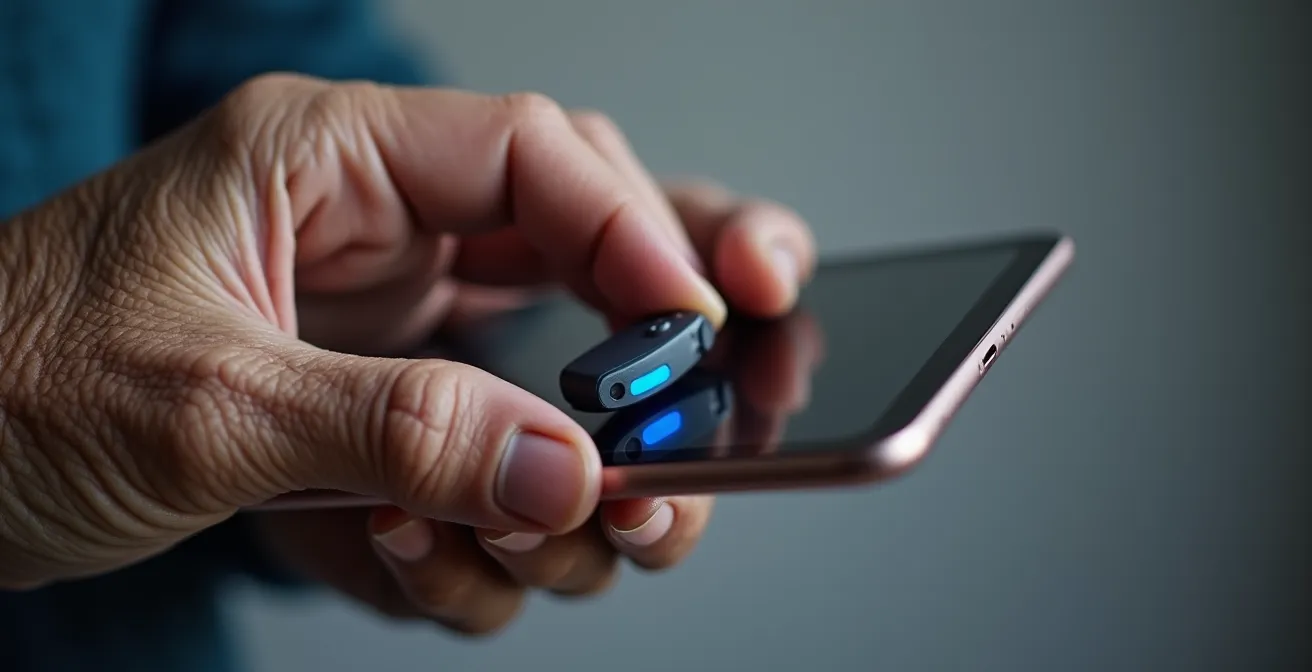
For a senior with hearing loss, a telemedicine call can quickly become an exercise in frustration if the device’s small speakers are muffled or distant. This creates a significant sensory gap, where critical medical advice or questions can be misheard or missed entirely. The most effective way to close this gap is to route the audio directly to their hearing aids via Bluetooth. This transforms the hearing aids into personal, high-fidelity speakers, ensuring every word from the doctor is heard with maximum clarity.
Fortunately, modern technology has made this process much more straightforward. Thanks to regulations and industry standards, pairing hearing aids is now a built-in feature on most devices. In fact, new FCC regulations require that 100% of smartphones sold in the U.S. be hearing aid compatible, and this technology extends to tablets. The key is to know which standard the hearing aids and the tablet use: MFi (Made for iPhone/iPad) for Apple devices or ASHA (Audio Streaming for Hearing Aids) for modern Android devices (version 10 or newer).
The pairing process itself is a one-time setup. Once connected, the tablet should automatically route call audio to the hearing aids whenever they are in range and turned on. Follow this simple checklist to establish the connection.
The steps below outline the universal process for pairing. Always check the specific manufacturer’s guide for any unique instructions.
- Step 1: Check Compatibility. Verify if the hearing aids are MFi (for an iPad) or ASHA (for an Android tablet running version 10+ with Bluetooth 5.0). This information is in the hearing aid’s manual or on the manufacturer’s website.
- Step 2: Initiate Pairing. On the tablet, go to Settings, then Bluetooth or Accessibility. Look for a “Hearing Devices” menu. Open the battery doors on the hearing aids and close them again to put them into pairing mode. They should appear on the tablet’s screen.
- Step 3: Confirm Audio Routing. Tap to pair the devices. Once connected, play a test sound (like a short video or music clip) on the tablet. Verify that the audio is coming through the hearing aids, not the device’s external speakers.
By directly connecting audio, you eliminate environmental noise and speaker quality as variables, ensuring the consultation is as clear and effective as being in the same room.
Email or Portal: What Is the Safest Way to Send X-Rays to Your Specialist?
After a consultation, a doctor might request a patient to send medical images, such as an X-ray or MRI file, to a specialist. The caregiver’s first instinct might be to attach the file to an email. This is a significant clinical risk. Standard email is not secure and does not comply with the stringent privacy rules of the Health Insurance Portability and Accountability Act (HIPAA). Sending Protected Health Information (PHI) this way exposes sensitive data to potential interception and breaches.
The only medically and legally sound method for transferring sensitive files is through the healthcare provider’s secure patient portal. These portals are specifically designed to protect patient data with end-to-end encryption. A healthcare security expert from HHS.gov offers a powerful analogy to explain the difference:
Email is like a postcard that can be read in transit. A patient portal is like a sealed, armored truck delivering directly to the recipient.
– Healthcare Security Expert, Telehealth Security Best Practices
Beyond security, patient portals offer other critical advantages. Medical images are often in a specialized format like DICOM, which contains high-resolution data and embedded patient information. Email systems can compress or alter these files, degrading their quality and potentially compromising their diagnostic value. Patient portals are built to handle these large, specialized formats without degradation. Furthermore, they often include a “delegate access” or “caregiver access” feature, allowing you to manage files on behalf of your loved one without the insecure practice of sharing passwords.
The table below, based on guidance from security best practices outlined by the Department of Health and Human Services, clearly illustrates why the patient portal is the only acceptable choice.
| Feature | Patient Portal | |
|---|---|---|
| Encryption | Often unencrypted | HIPAA-compliant encryption |
| File Compression | Automatic, degrades quality | Preserves DICOM format |
| Caregiver Access | Password sharing required | Delegate access feature |
| Session Security | Remains accessible | Auto-logout after inactivity |
Before the first telemedicine appointment, make sure you and your loved one are registered for the provider’s patient portal. Know the login credentials and practice uploading a test document so you are prepared when the need arises. This simple preparation prevents a major privacy risk.
The Lighting Mistake That Can Lead to a Misdiagnosis During a Video Call
Proper lighting is one of the most overlooked yet critical components of a successful telemedicine setup. It’s not about looking good on camera; it’s about ensuring the physician receives accurate visual information. Poor lighting can dramatically alter the appearance of skin tone, hide the texture of a rash, or cast shadows that mimic swelling or discoloration, severely compromising diagnostic fidelity. The single most common and damaging mistake is sitting with a bright window or a strong lamp directly behind the patient. This is known as “backlighting.”
When a camera is aimed at a backlit subject, its sensor is overwhelmed by the bright background. To compensate, it darkens the entire image, plunging the person in the foreground into a silhouette. From a clinical standpoint, the patient becomes an unreadable shadow. A dermatologist can’t assess a mole, a neurologist can’t observe facial expressions, and a primary care physician can’t judge a patient’s general complexion or energy level. The solution is simple: always face the primary light source.
For the most consistent and reliable results, natural light from a window is excellent. Position the desk or chair so the patient is facing the window, with the tablet or camera between them and the window. If natural light isn’t available or the appointment is at night, you can create a professional-grade setup using simple household lamps. The goal is to provide soft, even light from the front to eliminate harsh shadows.
Here is a simple, effective technique known as the “two-lamp solution” to ensure clear, diagnostically useful video:
- Position two household lamps at 45-degree angles to the patient’s face, one on the left and one on the right.
- Place the lamps at eye level or slightly above. This angle fills in shadows under the eyes and nose.
- If possible, use bulbs with the same color temperature (e.g., both “soft white” or both “daylight”) to provide consistent color representation.
- If the patient wears glasses, tilt the screen down slightly to minimize glare from the lamps reflecting in the lenses.
By controlling the lighting, you are actively improving the quality of data being sent to the physician. It’s a five-minute setup that can make the difference between an effective consultation and a wasted one.
How to Run a “Pre-Flight” Tech Check 15 Minutes Before Your Appointment?
The moments just before a telemedicine appointment can be the most stressful. Rushing to log in, test the camera, and check the audio creates anxiety that detracts from the consultation itself. The solution is to adopt the same mindset as a pilot: perform a methodical, routine “pre-flight” check. Creating a consistent, repeatable checklist 15 minutes before every call transforms a chaotic scramble into a calm, controlled process, ensuring a frictionless workflow when the doctor joins.
This isn’t just about making sure the tech works; it’s about building confidence and reducing the cognitive load on the senior. When they know the setup is tested and reliable, they can focus their energy on communicating their health concerns. The value of this structured support cannot be overstated. An initiative called TeleHealth Access for Seniors provides devices and guides to elderly patients, recognizing that structured support is essential for continuous care, especially since more than 50% of older Americans have 3 or more chronic conditions that benefit from regular, stress-free check-ins.
A simple, memorable checklist is the best tool for this. The C.L.A.S.S. acronym provides a five-point check that covers all the critical technical bases. It should be performed in the exact location the patient will be sitting for the call to ensure the environment is tested under real conditions.
Case Study: The Impact of Guided Setup
The TeleHealth Access for Seniors initiative equips elderly patients with not just devices but also simple, printed guides and free tech support. Their research confirms that for the more than 50% of older Americans managing three or more chronic conditions, this step-by-step guidance is a critical factor in reducing appointment-related stress and improving participation in continuous remote care.
By implementing a routine check, you are creating a predictable and calming ritual that makes technology feel less intimidating and more like a reliable tool for their health.
Your Pre-Appointment “C.L.A.S.S.” Checklist
- Connection: Look at the Wi-Fi icon on the device. Is it showing full strength? If not, move closer to the router.
- Lighting: Open the camera app. Is the patient’s face clearly visible and evenly lit, without any dark shadows or backlighting from a window?
- Audio: Play a short video or test sound. Can the patient hear it clearly through the device’s speakers or their connected hearing aids? Test the microphone by recording a short voice memo.
- Stability: Is the device secure in its stand or propped up safely? Gently nudge it to ensure it won’t fall over if the table is bumped.
- Software: Open the specific telemedicine app or website link. If prompted, grant permission for the camera and microphone. Ensure you are logged in and in the virtual “waiting room.”
Making this a non-negotiable part of the process will build confidence and ensure that when the appointment starts, the focus is 100% on healthcare.
Why a 10ms Delay Is Too Risky for Remote Surgical Procedures?
The term “latency” or “lag” often feels like a minor annoyance associated with video games or buffering movies. However, in a medical context, it’s a critical factor that can have profound consequences. The title’s mention of a 10-millisecond (ms) delay for remote surgery highlights an extreme scenario to illustrate a universal principle: the real-time nature of a connection is vital for medical accuracy. For a robotic surgeon, a delay of even 10ms could lead to a catastrophic error. While a standard consultation doesn’t have the same life-or-death stakes, the underlying issue of latency still poses a clinical risk.
During a typical video call, typical home connections experience a 300-500ms delay. This is the “lag” you feel when someone’s words are out of sync with their lip movements. While manageable in a social chat, this delay can cause significant problems in a medical context. A doctor might ask a patient to perform a physical action (like touching their nose) to assess motor skills. A half-second delay can make the patient’s response seem slow or hesitant, potentially leading to a misinterpretation of their neurological function. It can also lead to people talking over each other, causing frustration and breaking the conversational flow.
The goal is to minimize this latency as much as possible to improve the quality of the interaction. You don’t need a multi-million dollar surgical robotics connection, but you can take simple steps to ensure the connection is as stable and responsive as possible.
If you notice significant audio or video lag during consultations, here are a few steps to manage and mitigate the issue:
- Check Your Ping: Use a free online service like Speedtest.net to run a connection test. Pay attention to the “Ping” result, which measures latency. Anything under 100ms is generally good for video calls.
- Move Closer: If the ping is high, the simplest solution is often to move the device closer to the Wi-Fi router. Walls and distance are the biggest enemies of a stable wireless signal.
- Prioritize Audio: If the video is lagging but the audio is clear, advise the senior to focus on listening to the doctor’s words rather than watching their image. Clear audio is more critical for understanding instructions.
- Use a Wired Connection: If the Wi-Fi is consistently unreliable, the most stable solution is to connect the device directly to the router with an ethernet cable. This requires an adapter for most tablets but eliminates wireless interference entirely.
By taking these steps, you are actively working to improve the real-time quality of the consultation, reducing the chance of miscommunication and diagnostic errors caused by lag.
Key Takeaways
- A tablet is clinically safer than a phone for visual diagnoses due to its larger screen and tap targets.
- Always use a secure patient portal, not email, to transfer sensitive medical files like X-rays.
- Proper lighting is a diagnostic tool. The patient must always face the primary light source to avoid being silhouetted.
Why Using VoiceOver or TalkBack Reduces Battery Life by 20%?
For seniors with significant vision loss, accessibility features like VoiceOver (on Apple devices) and TalkBack (on Android) are not just helpful—they are essential gateways to the digital world. These screen readers audibly announce every item on the screen, enabling a user to navigate apps and websites without sight. However, this invaluable function comes at a hidden cost: increased battery consumption. Understanding this trade-off is crucial for ensuring a device is ready for a lengthy telemedicine appointment.
Screen readers increase battery drain for two primary reasons. First, the device’s processor is constantly working to interpret the on-screen elements and convert them into speech. Second, the text-to-speech engine and the device’s speaker are in continuous use. This combined activity can, as a general rule, reduce battery life by approximately 20% compared to standard use. The impact is even more pronounced during a video call, which is already one of the most power-intensive activities for any device. This finding is echoed in user reports from studies like the AARP’s 2024 tech trends analysis, which found that while 91% of adults 50+ own smartphones, experienced users of accessibility features note the critical importance of being plugged in.
This isn’t a reason to avoid using these essential tools. Instead, it’s a critical factor to plan for. A device that shows 50% battery might seem sufficient for an hour-long call, but with a screen reader and video running simultaneously, it could shut down mid-appointment.
The following table, based on general power consumption patterns, contextualizes the impact of a screen reader relative to other common features.
| Feature | Battery Impact | Power-Saving Strategy |
|---|---|---|
| VoiceOver/TalkBack | 20% faster drain | Keep plugged in during calls |
| Screen Magnification | 5-10% increase | Use selectively |
| High Brightness | 15-25% increase | Dim when using audio only |
| Video Calls | 30-40% faster drain | Charge before appointments |
The cardinal rule for any telemedicine call involving a screen reader is simple: keep the device plugged into a power source throughout the entire consultation. This single action eliminates battery anxiety and ensures the appointment can proceed without interruption.
How to Configure Accessibility Settings for Seniors with Vision Loss?
For a senior with vision loss, a standard tablet or phone interface can be an overwhelming sea of small text and tiny icons. The solution lies in the device’s accessibility settings, but activating too many features at once can create its own form of complexity. The goal is to create a simplified, high-contrast “Telemedicine Mode”—a curated set of just two or three essential settings that make the specific task of joining and participating in a video call as simple as possible. This approach creates a frictionless workflow by removing visual clutter and amplifying only what’s necessary.
Instead of enabling a full-time screen reader like VoiceOver (which can have a steep learning curve), start with the most impactful visual aids. The three most effective settings for moderate vision loss are often: 1. Increased Text Size: Makes all system text larger and easier to read. 2. Bold Text: Increases the weight of fonts, dramatically improving contrast and legibility. 3. Zoom: A feature that allows the user to magnify any portion of the screen with a simple gesture (like a three-finger double-tap).
Combining these three features creates a highly readable environment without the added complexity of a full screen reader. For users who need some audio assistance but not a full screen reader, the “Speak Selection” feature is a great intermediate tool. It allows the user to highlight text and have the device read just that selection aloud.
To prevent the senior from accidentally exiting the telemedicine app during a call, you can use features like Guided Access (on iOS) or App Pinning (on Android). These powerful tools lock the device into a single application, preventing any confusion from unintended taps or swipes. To exit this mode, a passcode is required, which the caregiver can manage.
Follow these steps to build a repeatable, simplified setup for every appointment:
- Activate 2-3 Core Settings: In the Accessibility menu, enable Increased Text Size, Bold Text, and Zoom. Avoid cluttering the experience with other settings initially.
- Enable Single-App Mode: Set up Guided Access (iOS) or App Pinning (Android) and practice starting a session within the telemedicine app. This is your “safety lock.”
- Check In-App Settings: Open the telemedicine app itself. Many have their own accessibility menu that can further increase font sizes or enable a high-contrast theme.
- Document the Sequence: Write down the simple steps for the senior: 1. Open App, 2. Caregiver starts Guided Access. This creates a predictable routine.
By thoughtfully curating the experience, you transform the device from a source of frustration into a clear, simple, and reliable window to their doctor. This preparation is an act of care that ensures your loved one can advocate for their health with confidence and independence.