The common belief that you need a new, expensive phone for great product photos is wrong. The key to professional results that actually drive sales is not the camera, but mastering control over light and your phone’s hidden settings.
- A $20 ring light provides consistent, controlled lighting that outperforms unpredictable window light for e-commerce.
- Shooting in RAW and disabling your phone’s automatic “enhancements” (like Smart HDR) gives you the power to achieve true-to-life color accuracy.
Recommendation: Stop relying on your phone’s automatic mode. Switch to a manual or pro camera app, invest in a cheap light source, and adopt a simple RAW editing workflow to transform your product visuals.
As a small business owner, you know that compelling visuals are not just an asset; they are the entire storefront for your online brand. The pressure to produce stunning product photos can lead you down a rabbit hole of expensive camera listings and complex tutorials. Many articles will tell you the solution is to “find good natural light” or “use a clean background.” While not incorrect, this advice is incomplete and often leads to inconsistent results that don’t build a cohesive, professional brand identity.
The truth is, the multi-lens, high-megapixel camera in your pocket is more than capable. The problem isn’t the hardware. The problem is the automatic software and the passive approach most people take to lighting. Your phone is programmed to take a pleasing snapshot for social media, not an accurate, commercially viable product image. According to a recent report, with more than 72% of global eCommerce traffic coming from mobile devices, your photos must be flawless on these very screens.
But what if the path to studio-quality images wasn’t about buying a new $1000 phone, but about investing $20 in the right tool and, more importantly, shifting your mindset from a picture-taker to a light-shaper? This guide will bypass the generic tips. We’ll dive into the professional techniques of controlled lighting, RAW file management, and efficient editing workflows—all achievable directly on your smartphone. We will deconstruct the settings that are secretly sabotaging your photos and give you a repeatable system for producing images that look expensive, build customer trust, and ultimately, drive sales.
This article will provide a clear, step-by-step roadmap. You’ll learn not just what to do, but why it works, empowering you to take control of your product photography once and for all.
Summary: A Practical Guide to Smartphone Product Photography
- Why a $20 Ring Light Improves Sales More Than a New $1000 Phone?
- How to Edit RAW Photos on Mobile to Match Real Product Colors?
- Optical or Digital Zoom: When Does Image Quality Break Down for Product Shots?
- The Setting Mistake That Makes Your Photos Look Over-Processed
- How to Batch-Process 50 Photos on Your Phone in Under 10 Minutes?
- Why Your Phone’s AR Tape Measure Might Be Off by 2 Inches?
- From Phone to Store: The Fastest Way to Transfer Your Product Photos
- Studio vs. Lifestyle: Mastering the Two Essential Shots for Every Product
Why a $20 Ring Light Improves Sales More Than a New $1000 Phone?
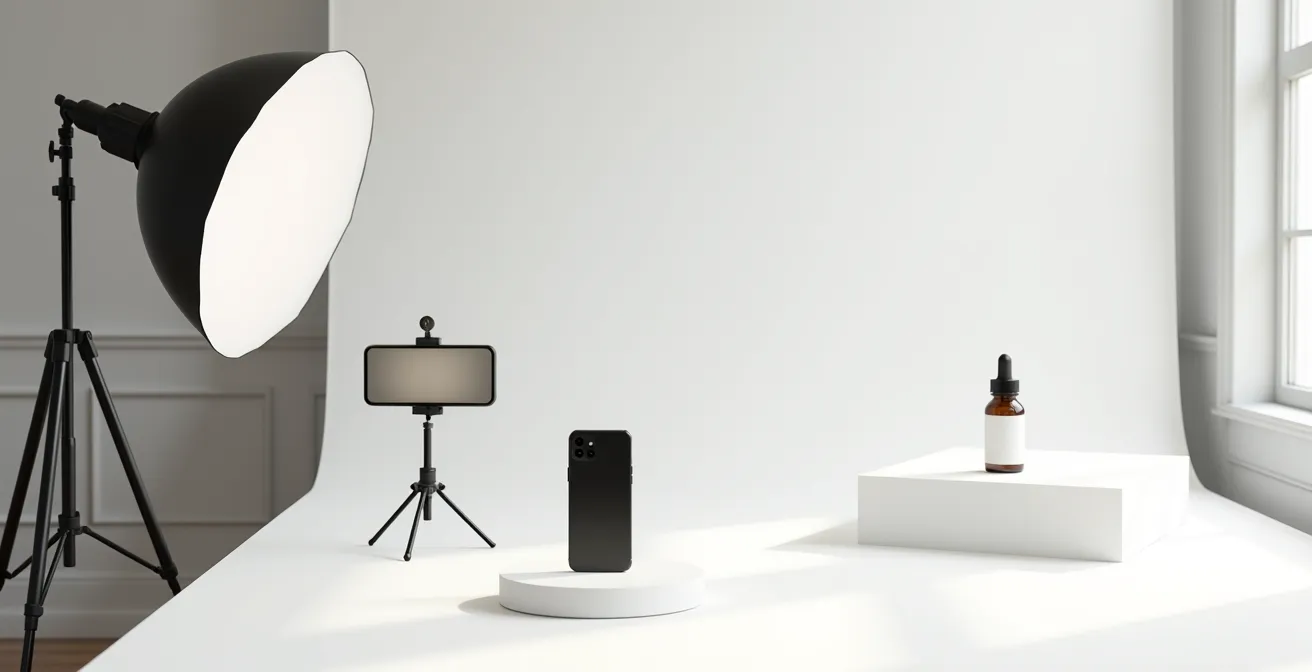
The most common advice for smartphone photography is to “use natural light.” For casual photos, it’s great advice. For e-commerce, it’s a liability. Natural light is inconsistent; it changes color, intensity, and direction by the minute. One product shot at 10 AM will look completely different from one at 2 PM, destroying your brand’s visual consistency. The secret to professional product photography isn’t a better sensor; it’s controlled, repeatable lighting. This is where a simple, inexpensive light source fundamentally changes the game.
Investing in a new phone gives you marginal improvements in software processing. Investing in a $20 ring light or a small softbox gives you absolute control, the single most important factor for commercial imagery. Controlled light means every photo in your product line can have the exact same look and feel, building a strong, trustworthy brand aesthetic. This professional consistency has a direct impact on the bottom line. In fact, an analysis found that e-commerce businesses that incorporated advanced product imaging technologies saw a 27% increase in sales. Controlled lighting is the first and most accessible of these technologies.
You don’t need a complex, expensive setup. A powerful, budget-friendly kit is easy to assemble:
- Ring light ($20): Best for flat lays, beauty products, and small items needing even, shadow-free frontal lighting.
- Small softbox ($30): Superior for 3D products like bottles or electronics, creating desirable soft shadows that define shape.
- White foam core boards ($10): Essential for bouncing light back onto your product, filling in harsh shadows and making it “pop” from the background.
- DIY lightbox: For highly reflective items like jewelry, a simple lightbox made from a cardboard box and white tissue paper can create perfectly diffuse, reflection-free light.
How to Edit RAW Photos on Mobile to Match Real Product Colors?
Now that your lighting is consistent, the next professional step is ensuring perfect color fidelity. Nothing erodes customer trust faster than receiving a product that doesn’t match the color they saw online. Your phone’s default camera app is designed to produce a “pleasing” image, not an accurate one. It automatically adjusts saturation and white balance, often shifting colors. To bypass this, you must shoot in RAW (often labeled as Pro mode or resulting in a .DNG file) and take control of color correction yourself.
The industry-standard method for perfect color is using a gray card. It sounds technical, but on a mobile device, it’s incredibly simple. A gray card provides your editing app with a perfect neutral reference, allowing it to correct the color cast from your lights and environment in one click. This ensures that a red dress looks like the *exact* same red on your store as it does in person. The process is straightforward in an app like Adobe Lightroom Mobile.
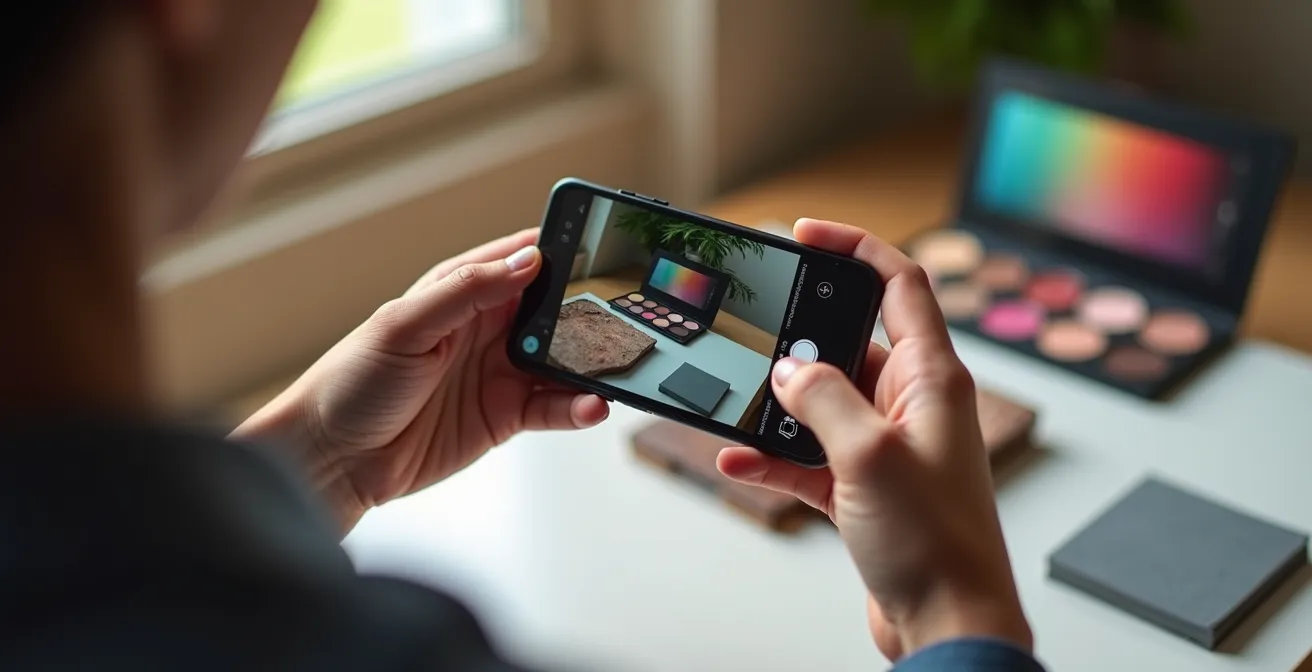
Follow these steps for guaranteed color accuracy:
- Place a physical gray card in your very first shot of the session, next to the product.
- Open that RAW photo in Lightroom Mobile or a similar app that supports RAW editing.
- Find the white balance tool, which usually has an eyedropper icon.
- Tap the eyedropper directly on the gray card in your photo. The colors of the entire image will instantly snap into perfect, true-to-life accuracy.
- Save this adjustment as a preset (e.g., “Main Product Light”).
- You can now apply this preset to all other photos from that same session for instant, consistent color correction across the board.
While the gray card sets your baseline, different product types can benefit from subtle, targeted adjustments to enhance their appeal without sacrificing accuracy. Here is a general guide to get you started.
| Product Type | Saturation | Temperature | Contrast | Special Adjustments |
|---|---|---|---|---|
| Food | +10 to +15 | Warm (+200K) | +5 | Boost vibrance for freshness |
| Jewelry | 0 to +5 | Neutral | +10 to +15 | Use selective tool to brighten metals/gems |
| Apparel | 0 | Accurate to gray card | +5 | Prioritize white balance accuracy |
| Electronics | -5 | Cool (-100K) | +10 | Enhance clarity for technical precision |
Optical or Digital Zoom: When Does Image Quality Break Down for Product Shots?
Getting closer to small products is a common challenge. The instinct is to pinch-to-zoom, but this is one of the biggest mistakes you can make. It’s crucial to understand the difference between optical zoom and digital zoom. Optical zoom uses the phone’s actual lenses to magnify the image, preserving quality. Most modern smartphones have 2x, 3x, or even 5x optical zoom lenses. Digital zoom, on the other hand, is simply an in-camera crop. It enlarges the pixels from the main sensor, leading to a dramatic loss of detail, sharpness, and overall quality. It makes your photos look pixelated and unprofessional.
For product shots, you should almost exclusively rely on optical zoom. Using your phone’s 2x or 3x lens does more than just get you closer; it provides perspective compression. The main 1x lens on a phone is a wide-angle, which can distort the shape of 3D objects, making them look bulbous or warped. The longer telephoto (optical zoom) lens flattens the perspective, rendering products with more accurate, pleasing proportions—much like a professional portrait lens. As photographer Brandon Figueroa has demonstrated, using the 2x optical zoom on a standard smartphone can achieve better perspective for a bottle shot, avoiding wide-angle distortion while capturing sharp, commercial-quality details.
For maximum quality, think of your zoom options as a clear hierarchy:
- Optical Zoom (2x, 3x, etc.): Always the best choice. It provides natural perspective and maximum detail. Physically move closer or farther to frame your shot.
- Portrait Mode (using the telephoto lens): This uses the optical zoom lens and adds a simulated background blur, which can be great for lifestyle shots.
- Cropping a High-Res 1x Photo in Post-Production: If you can’t get close enough optically, shooting with the main high-resolution lens and cropping later gives you more control and better quality than digital zoom.
- Digital Zoom (up to 2x): Use with extreme caution. It might be acceptable for very small web thumbnails where the quality loss isn’t as noticeable.
- Digital Zoom (beyond 2x): Never use this for a final product photo. The image degradation is too severe.
The Setting Mistake That Makes Your Photos Look Over-Processed
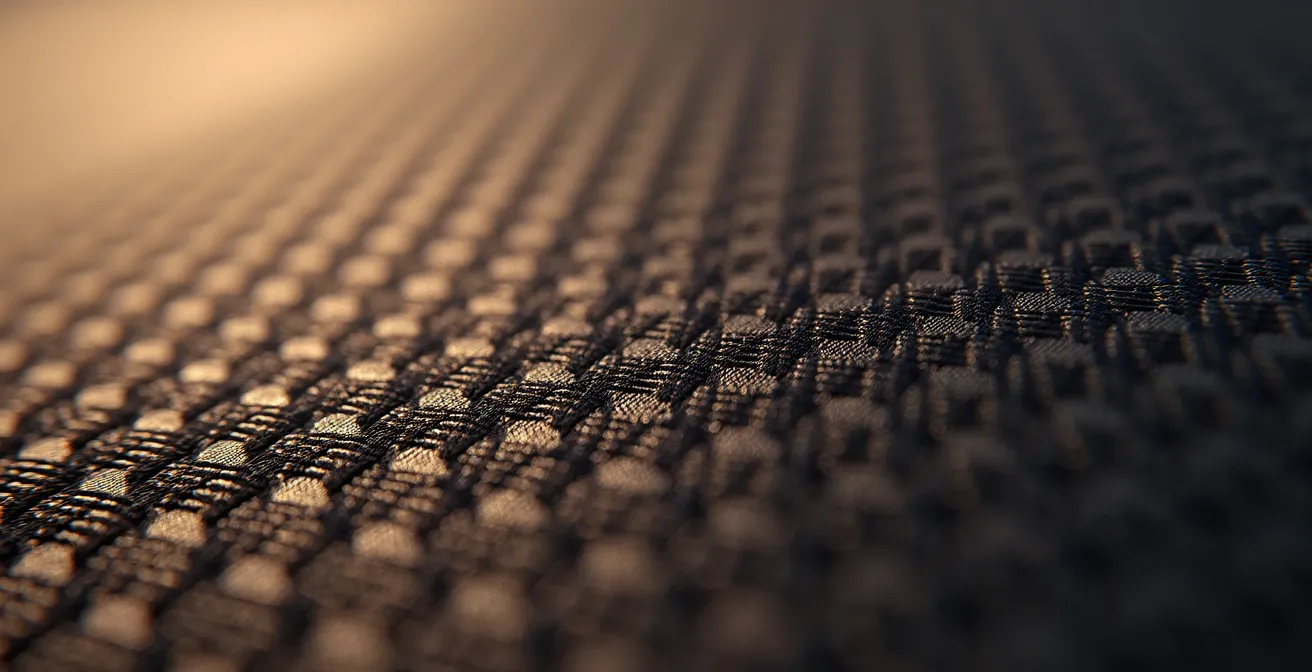
You’ve controlled your light and mastered color, but your photos of textured products like fabric or leather still look… fake. They have an artificial, crunchy sharpness and strange glows around the edges. This is not your fault; it’s your phone’s. The biggest enemy to authentic product photography is your phone’s own computational over-processing. Features like “Smart HDR,” “Scene Optimizer,” or “Photographic Styles” are designed to create high-impact, dramatic photos by merging multiple exposures. While great for landscapes, this process crushes the subtle, natural textures that communicate quality in a product.
These algorithms aggressively sharpen details, increase contrast, and “enhance” colors, destroying the delicate micro-shadows and tactile information that a customer uses to judge material quality. The result is a plastic-looking, over-processed image that cheapens your product. The solution is simple: turn these features off. By shooting in a manual or “Pro” mode (which often produces a RAW/DNG file), you bypass this destructive processing and capture the clean, honest data from the sensor. This gives you a natural, film-like base image that you can then gently enhance yourself in editing, preserving the all-important texture.
Finding these settings can be tricky as they vary by manufacturer, but here’s a general guide:
- For iPhone: Go to Settings > Camera. Turn OFF ‘Smart HDR’ and ensure ‘Photographic Styles’ is set to the standard, non-contrasty profile. For ultimate control, use a third-party app that shoots RAW.
- For Samsung: In the Camera app, go to Settings. Turn OFF ‘Scene Optimizer’ and ‘Shot suggestions’. Use the ‘Pro’ mode to capture RAW files.
- For Google Pixel: In the Camera settings, go to advanced options and disable ‘HDR+’ to gain more manual control, or use the RAW mode.
- Universal Solution: Use the Pro mode within the Lightroom Mobile camera. It’s designed to capture clean DNG RAW files on any phone, completely bypassing the manufacturer’s processing.
How to Batch-Process 50 Photos on Your Phone in Under 10 Minutes?
Taking one perfect photo is an art. Processing 50 of them efficiently is a business. As a shop owner, your time is your most valuable resource. The key to a fast and consistent post-production workflow is batch processing using presets. The “Gray Card Method” we discussed earlier is the first step. Once you’ve perfected the color, exposure, and contrast on your first “hero” image from a photo session, you can save those exact settings as a preset and apply them to all other photos from that session with a single tap.
This workflow, easily done in Lightroom Mobile, is a game-changer. It ensures every image from that lighting setup has a perfectly consistent look. Instead of editing each photo from scratch, you spend a few minutes perfecting one, then apply those settings instantly to the rest. Your only remaining task is to quickly review each image for minor individual tweaks, like cropping or removing a dust spot. But before you even open your editing app, a simple file management system can streamline the entire process.
Professional photographers recommend a clear folder structure on your phone to stay organized. Create three albums or folders: “01_To Edit” for all the RAW files straight from your camera, “02_Edited for Web” for your final high-resolution JPGs, and “03_Edited for Instagram” for any square-cropped or social-optimized versions. This prevents confusion and makes finding the right file effortless.
Here is the step-by-step batching workflow in Lightroom Mobile:
- Edit your ‘hero’ photo: Open the first photo (the one with the gray card) and perfect its exposure, white balance, shadows, and highlights.
- Create the preset: With the photo edited, tap the three-dot menu and choose ‘Create Preset’. Give it a clear name like ‘Product Session – White BG’.
- Select the batch: Go back to the grid view. Long-press on an image to enter selection mode, then tap to select all other photos from that same session.
- Apply the preset: With all photos selected, find the ‘Presets’ icon in the bottom toolbar and tap on the preset you just created. All photos will be instantly updated.
- Fine-tune and export: Quickly scroll through the edited photos, making any small individual adjustments needed (like crop or rotation). Then, select them all again and use the ‘Export’ function to save them as JPGs to your “02_Edited for Web” folder.
Action Plan: Your Pre-Shoot Workflow Audit
- Phone Prep: Is your phone fully charged and do you have at least 5GB of free storage? Have you cleaned your lenses?
- Stabilization: Do you have your tripod or a stable surface ready to ensure sharp photos?
- Folder Structure: Have you created the ’01_To Edit’, ’02_Edited for Web’, and ’03_Edited for Instagram’ folders/albums on your phone?
- Camera App Settings: Have you opened your chosen camera app (Pro mode or Lightroom) and confirmed it’s set to shoot in RAW/DNG and that all auto-enhancements (HDR, Scene Optimizer) are disabled?
- Lighting & Color Check: Is your lighting setup ready, and is your gray card within reach for the first shot?
Why Your Phone’s AR Tape Measure Might Be Off by 2 Inches?
Communicating the scale of your product is one of the most critical jobs of e-commerce photography. Customers need to understand if a necklace is delicate or chunky, or if a pouch will fit their tablet. Augmented Reality (AR) tools, like your phone’s built-in tape measure, seem like a futuristic solution. While the technology is impressive and constantly improving, it’s not yet reliable enough for commercial precision. These apps rely on the phone’s sensors to interpret 3D space, and factors like lighting, surface texture, and camera angle can easily throw off a measurement by a crucial inch or two, leading to customer disappointment and returns.
While AR for measurement is risky, AR for visualization is transforming e-commerce. Features that allow customers to place a 3D model of your product in their own room are incredibly powerful. In fact, studies show that products with VR, AR, and 3D visual elements have seen a 94% increase in conversion rate. This is the future. But for conveying simple scale *today* in 2D photography, a low-tech, universally understood solution is far more trustworthy: visual scale cues.
Including a common object in one or two of your photos instantly gives the customer’s brain the context it needs to understand size. This method is foolproof and builds a sense of authenticity.
- Use a coin (like a quarter or euro) next to small jewelry or accessories.
- Include a human hand or finger in the shot for wearable items or cosmetics to show how they are held or used.
- Place a credit card (a standard, universal size) beside small electronics or wallets.
- Use a standard pen or pencil for stationery and office goods.
- For ultimate clarity, include a ruler in one reference shot, then remove it for your main “hero” images.
From Phone to Store: The Fastest Way to Transfer Your Product Photos
Your photos are edited and ready. The final step is moving these large, high-quality files from your phone to your computer or e-commerce platform. The method you choose can have a big impact on your workflow’s speed and the integrity of your files. Sending images via messaging apps or basic Bluetooth is a common mistake; these services heavily compress files, undoing all your hard work to preserve quality. You need a method that is both fast and lossless.
For transferring large batches of RAW or full-resolution JPG files, nothing beats a direct physical connection. Using your phone’s USB-C or Lightning cable to connect directly to a computer is by far the fastest and most reliable method. It guarantees a perfect, bit-for-bit copy of your files with no quality loss. This should be your default method for any serious volume of work.
When a physical connection isn’t practical, wireless options exist, but they come with different levels of speed and reliability. Cloud services like Dropbox or Google Drive are excellent for remote collaboration and backup but are limited by your internet upload speed. Direct Wi-Fi transfer tools like AirDrop (for Apple devices) or Nearby Share (for Android) are very fast for a few files but can be less reliable for large batches of 100+ images. The key is to choose the right tool for the job.
Here’s a clear breakdown of your options, ranked by a combination of speed and reliability for handling large photo files.
| Transfer Method | Speed | Reliability | Best For |
|---|---|---|---|
| USB-C/Lightning Cable | Fastest (10Gbps+) | Most Reliable | Large batches, RAW files |
| Network Drive/NAS | Fast (1Gbps on WiFi 6) | Very Reliable | Office workflow |
| Cloud Services | Medium (varies) | Reliable | Remote collaboration |
| AirDrop/Nearby Share | Fast for small files | Good | Quick single transfers |
| Bluetooth | Very Slow | Poor for large files | Not recommended |
Key takeaways
- Control is everything: Consistent, controlled lighting (even from a cheap source) is more valuable than a new phone’s camera.
- Shoot RAW, not JPEG: Disable your phone’s automatic HDR and “enhancements” to capture natural textures and achieve true-to-life color with a gray card.
- Workflow is king: Use presets and a clear folder structure to batch-edit dozens of photos efficiently, saving you hours of work.
Studio vs. Lifestyle: Mastering the Two Essential Shots for Every Product
You’ve now mastered the technical skills to create a perfect product photo. The final strategic layer is to understand the two fundamental types of images every product needs: the studio shot and the lifestyle shot. Each serves a different, vital purpose in the customer’s journey. The studio shot appeals to their logical brain, while the lifestyle shot connects with their emotional desires.
The studio shot is your workhorse. It’s the clean, clear, perfectly lit image on a plain white or neutral background. Its job is to show the product with absolute clarity and accuracy, free from all distractions. This is where you use your controlled lighting (softbox or ring light) and your color-corrected RAW workflow to represent the product’s details, texture, and true color. This image builds trust and answers the customer’s practical questions: “What does it *really* look like?”
The lifestyle shot, in contrast, tells a story. It shows your product in a real-world context, helping the customer imagine it in their own life. This is where you can use softer, more atmospheric lighting, like natural window light or the “golden hour” sun. This image isn’t about perfect technical accuracy; it’s about creating a mood, suggesting a benefit, and building an aspirational brand. Platforms like Shopify are even pushing this further, enabling businesses to upload 3D models so customers can use AR to place products in their own homes, a powerful evolution of the lifestyle concept.
To maintain brand consistency, you should aim to capture and edit both types of shots in a cohesive way. Here’s a simple framework:
- Studio Shot Setup: Use a clean white background and your main controlled light source. Focus on even illumination and perfect color accuracy.
- Lifestyle Shot Setup: Place the product in a relevant, natural environment. Use window light or outdoor light to create mood and context.
- Capture in One Session: Photograph both setups at the same time to save time and ensure the product itself is consistent.
- Edit for Consistency: When editing your lifestyle shots, use your perfectly color-corrected studio shot as a reference to ensure the product’s colors don’t stray too far, even in different lighting.
- Test Across Devices: Check how both image types appear on different phones and monitors to ensure they look great everywhere.
Now that you are equipped with the technical skills and strategic framework, you can begin transforming your product listings from simple snapshots into a powerful sales engine, all with the device you already own.