
The key to preventing earbud-induced infections isn’t just cleaning, but actively managing your ear canal’s delicate micro-environment.
- Trapped moisture and excessive pressure from a poor fit are the primary culprits, creating an ideal breeding ground for bacteria.
- Material choice (like memory foam) and strategic use of device features can dramatically reduce irritation and moisture buildup.
Recommendation: Adopt a full hygiene protocol that includes not only sanitizing your device but also scheduling regular “breathing breaks” for your ears.
For remote workers, runners, and commuters, in-ear headphones are an indispensable part of daily life. Yet, for many who wear them for hours on end, a nagging discomfort can evolve into a painful reality: recurrent ear infections. The common advice—clean your earbuds and don’t share them—is a necessary first step, but it often falls short for heavy users. This is because the problem is more complex than simple surface contamination. It involves a delicate interplay of heat, moisture, and pressure within the ear canal, a phenomenon known as the occlusion effect.
When you seal your ear canal for extended periods, you trap moisture and warmth, creating a humid micro-environment perfect for bacterial growth. This can lead to otitis externa, commonly called “swimmer’s ear,” even if you haven’t been near a pool. But what if the solution wasn’t just about reactive cleaning, but about proactive environmental control? The key to long-term comfort lies in understanding and managing the physical and material factors at play—from the type of ear tip you use to the way you care for your device after a workout.
This guide moves beyond the basics to provide a clinical perspective on preventing ear infections. We will explore how material choices can reduce physical stress on the ear, detail safe and effective sanitization methods that protect your device, and outline practical habits to maintain a healthy ear canal environment, allowing you to enjoy your audio without compromising your health.
Summary: Preventing Ear Infections From Extended Earbud Use
- Why Memory Foam Tips Might Reduce Irritation for Sensitive Ears?
- How to Sanitize Your Earbuds Mesh Without Damaging the Drivers?
- Over-Ear or In-Ear: Which Is Less Painful for People Who Wear Thick Glasses?
- The Mistake That Corrodes Charging Contacts After a Workout
- How to Test Earbud Stability Before Buying for High-Impact Sports?
- When to Replace Ear Pads to Restore Lost Noise Cancellation Power?
- The Marketing Trick Behind “Hi-Res Certified” Stickers on Budget Earbuds
- How to Configure “Silent Mode” on Your Headphones for Pure Focus?
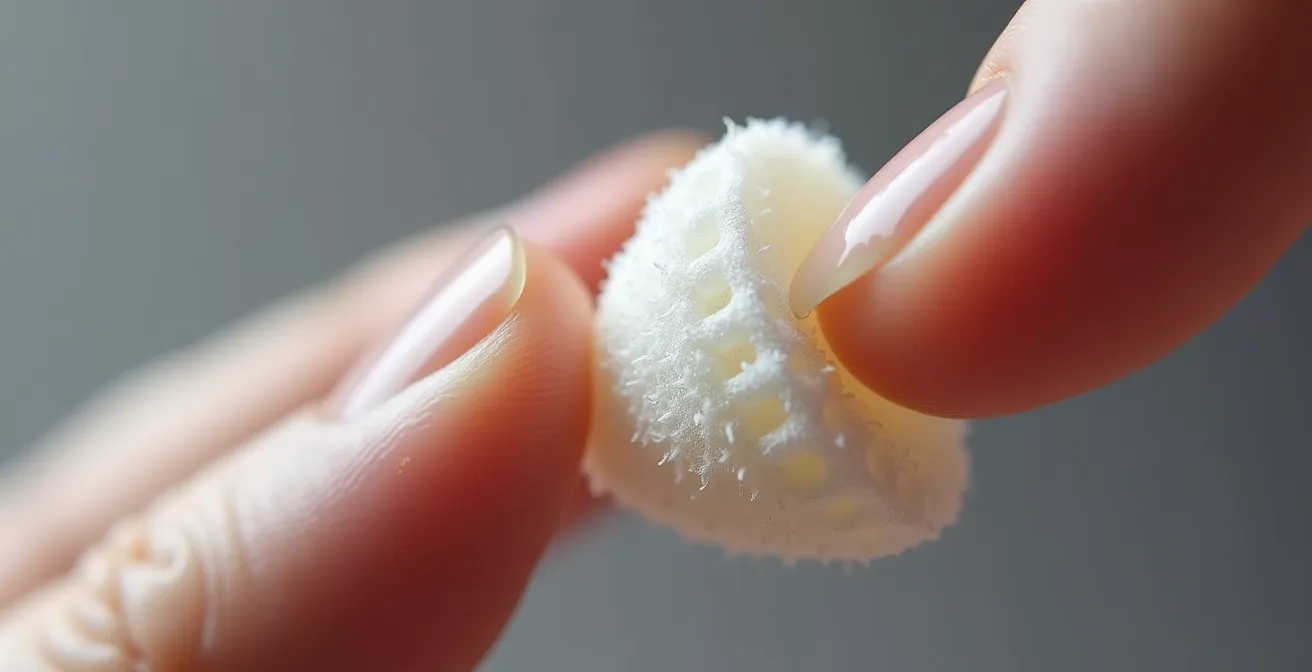
Why Memory Foam Tips Might Reduce Irritation for Sensitive Ears?
For individuals with sensitive ear canals, the standard silicone tips that come with most earbuds can be a source of constant, low-grade irritation. Their rigid structure can create pressure points, and their non-porous surface can trap moisture against the skin. This is where the material science of ear tips becomes critically important. Memory foam offers a compelling alternative due to its unique physical properties. Unlike silicone, memory foam is viscoelastic; it deforms under heat and pressure, allowing it to conform precisely to the unique shape of your ear canal. This creates a more uniform seal with fewer pressure points.
This improved conformity has a significant clinical benefit: it drastically reduces mechanical stress on the delicate skin inside the ear. Research indicates that memory foam tips reduce ear canal pressure by 50% compared to more rigid materials. This reduction in pressure minimizes micro-abrasions and skin irritation, which are often precursors to infection. Furthermore, the porous nature of some foams can help manage the micro-environment by allowing for minimal air exchange, though proper hygiene remains paramount. For those who experience fatigue or pain from long-term use, switching to memory foam can be a transformative step towards greater comfort.
However, the porous nature of foam also means it requires a specific cleaning protocol to prevent it from becoming a reservoir for bacteria. It’s essential to clean them correctly to maintain both hygiene and the material’s integrity.
- Do not clean tips when they are warm and soft straight out of your ear.
- Once they have returned to room temperature, wash the tips gently in warm water.
- Squish them with a soft cloth and allow them to air dry completely before the next use.
- Never use soap, detergent, or alcohol-based cleaners, as these will break down the foam’s structure.
- Clean your foam tips about once a month for optimal hygiene and longevity.
How to Sanitize Your Earbuds Mesh Without Damaging the Drivers?
While ear tips are the primary point of contact, the earbud’s speaker mesh is a critical area for hygiene that is often overlooked. This fine grille protects the delicate internal components—the drivers—from dust, debris, and earwax. However, its very design makes it a trap for buildup, which can not only muffle sound quality but also harbor bacteria. Cleaning this area requires a delicate touch; aggressive methods or excessive moisture can permanently damage the drivers within. A safe, effective sanitization protocol is therefore essential.
The goal is to dislodge and remove debris without pushing it further into the housing or using liquids that could cause electronic failure. A multi-tool approach using dry implements is the safest starting point. This method ensures that you are mechanically removing buildup rather than dissolving it and risking liquid ingress. Only after the bulk of the debris is gone should a minimal amount of disinfectant be considered.
For a thorough and safe cleaning of the mesh and the earbud body, follow this structured protocol:
- Weekly Wipe-Down: Use a dry cotton swab once a week to gently wipe away any visible dust or wax buildup from the mesh and surrounding surfaces.
- Detailing Crevices: Use a wooden or plastic toothpick to carefully clean hard-to-reach corners or crevices on the outside of the earbud housing. Avoid metal tools that can scratch the plastic.
- Brushing the Mesh: A clean, dry, soft-bristled toothbrush can be an excellent tool. Gently brush the speaker mesh to dislodge any stubborn particles.
- Air Power: After brushing, blow a sharp puff of air into the mesh grill to loosen any remaining bits. Do not use canned air, as its high pressure can damage the internal components.
- Final Sanitization: For a deeper clean, lightly dampen a cotton swab with 70% isopropyl alcohol—it should not be dripping. Carefully wipe the mesh and the body of the earbud. The alcohol evaporates quickly, minimizing the risk of liquid damage.
Over-Ear or In-Ear: Which Is Less Painful for People Who Wear Thick Glasses?
For those who wear glasses, especially with thicker frames, the choice of headphones goes beyond audio quality and becomes a matter of physical comfort and even health. The constant pressure from an over-ear headphone’s clamping force on the arms of glasses can cause significant pain around the ears and temples. This pressure also breaks the seal of the earcup, compromising noise cancellation and encouraging users to increase the volume to unsafe levels. As Dr. Hayley Ralph of OSF HealthCare notes, “Headphones that sit over the outside of the ears instead of inside them may help reduce the risk of ear infections.” While this is true in general, for glasses-wearers, the equation is more complex.
Headphones that sit over the outside of the ears instead of inside them may help reduce the risk of ear infections
– Dr. Hayley Ralph, OSF HealthCare
In-ear earbuds completely bypass the issue of pressure on glasses arms, making them a superior choice for comfort during extended wear. Since they don’t interact with the glasses frames, they can maintain a proper seal, providing better sound isolation and a more comfortable listening experience. However, this places a greater emphasis on in-ear hygiene. A third option, bone conduction or open-ear headphones, offers an excellent compromise by leaving the ear canal completely open and resting on the cheekbones, thus avoiding both pressure on glasses and occlusion of the ear.
The following table provides a clear comparison to help glasses-wearers make an informed decision based on their primary concerns.
| Feature | Over-Ear Headphones | In-Ear Earbuds | Open-Ear/Bone Conduction |
|---|---|---|---|
| Pressure on glasses arms | High – direct clamping force | None | None |
| Seal integrity with glasses | Compromised by arms | Not affected | N/A – no seal needed |
| Comfort for extended wear | Poor with glasses | Good if proper fit | Excellent |
| Risk of ear infections | Low | Higher if not cleaned | Lowest |
The Mistake That Corrodes Charging Contacts After a Workout
For athletes and fitness enthusiasts, sweat-resistant earbuds are a must. However, even models with a high IP (Ingress Protection) rating are susceptible to a common, costly mistake: placing them back in their charging case immediately after a workout. Sweat is not just water; it’s a saline solution containing salts and electrolytes that are highly corrosive to metal. When you put damp earbuds into the case, this moisture gets trapped against the delicate metal charging contacts on both the earbuds and inside the case itself.
This creates a perfect storm for galvanic corrosion, a process where an electrical current (from the charging system) accelerates the degradation of the metal contacts. The result is discoloration, pitting, and eventually, a complete failure to charge. This damage is often not covered by warranties, as it’s considered user-induced. Beyond the financial cost, the trapped moisture also contributes to a thriving bacterial environment. Studies have found that earbuds can have 330 times more bacteria than a kitchen counter, a number that skyrockets when moisture from sweat is added to the mix. Therefore, a strict post-workout care protocol is non-negotiable for both the longevity of your device and your ear health.
The key is to ensure the earbuds and their contacts are completely dry before they are stored or charged. This simple habit disrupts the process of corrosion and denies bacteria the moist environment they need to flourish.
Your Action Plan: Post-Workout Earbud Care
- Immediate Wipe-Down: As soon as your workout is over, wipe the earbuds thoroughly with a dry, lint-free cloth. Pay special attention to the charging contacts.
- Air-Dry Period: Let the earbuds air-dry outside of the case for at least 15-20 minutes. Do not leave them in a humid gym bag; place them in a well-ventilated area.
- Case Maintenance: Once a week, use a dry cotton swab to clean the contact pins inside the charging case itself to remove any accumulated grime or incipient corrosion.
- Proper Storage: If you’re not charging them, store the earbuds in a dry, ventilated space. Avoid leaving the case in a steamy bathroom or a damp gym bag.
- Regular Inspection: Visually check the charging contacts on both the earbuds and the case weekly for any signs of green or white discoloration, which indicates early corrosion.
How to Test Earbud Stability Before Buying for High-Impact Sports?
For runners, HIIT enthusiasts, and anyone engaging in high-impact activities, earbud stability is paramount. An earbud that constantly shifts or falls out is not only distracting but can also be a significant factor in ear irritation. A poor fit forces the user to repeatedly push the earbud back in, causing friction and micro-abrasions in the ear canal that can open the door to infection. As Dr. Elias Michaelides, an ENT specialist at Rush University Medical Center, warns, “Sometimes if the device is not sitting well it can cause irritation in the ear canal.” Therefore, testing for a secure and stable fit before purchasing is a crucial step in preventing future problems.

A proper fit is not just about tightness; it’s about finding a “locked-in” feel without noticeable pressure. The earbud should feel like a natural extension of your ear, not a foreign object wedged inside. Many retailers offer demo units, and you should take full advantage of this to simulate real-world conditions. Don’t just stand still; move around and mimic the activities you’ll be using them for. This hands-on testing is the only way to truly gauge whether a particular model and tip size will work for your unique ear anatomy during dynamic movement.
When you have a chance to try on a pair of earbuds in-store, follow this testing protocol to assess their stability:
- The Jaw and Shake Test: While wearing the earbuds, vigorously chew, yawn widely, and shake your head from side to side and up and down. They should remain securely in place.
- The Fit Check: The earbuds should slide into your ears easily. If they feel too big, you’ll experience uncomfortable pressure. If they’re too small, they will feel loose and lack a proper seal.
- The Comfort Test: A correctly fitting earbud should almost disappear. After a minute or two, you shouldn’t feel any distinct pressure points. If you are constantly aware of them, the fit is not right.
- Movement Simulation: If space allows, try a few jumping jacks or jogging in place. This is the ultimate test of stability for high-impact sports.
- The Duration Test: Wear the demo unit for at least 5-10 minutes. Pressure points and discomfort that aren’t immediately obvious can become apparent over a slightly longer period.
When to Replace Ear Pads to Restore Lost Noise Cancellation Power?
While much of the focus is on in-ear hygiene, users of over-ear headphones face their own set of maintenance challenges that impact both performance and health. The foam or leatherette ear pads are the primary interface with your head, and over time, they degrade. This degradation is not just cosmetic; it directly impacts the effectiveness of Active Noise Cancellation (ANC). ANC relies on a tight physical seal to create a closed acoustic environment. As ear pads compress, crack, and lose their pliability, this seal is compromised, allowing external noise to leak in and forcing the ANC system to work harder, often less effectively.
From a hygiene perspective, worn ear pads are a major concern. They absorb sweat, oils, and skin cells, becoming a breeding ground for bacteria that can cause skin irritation and acne around the ears. For anyone experiencing these issues, a simple replacement of the ear pads can make a world of difference. The experience of Julia Addis, a professional who used earbuds for 7-8 hours daily during remote work, highlights the importance of managing ear health with audio devices. She developed frequent ear infections due to constant irritation. Her solution, as recommended by Dr. Michaelides, was to implement regular breaks. This principle of giving your ears a rest applies to over-ear users as well.
Case Study: The Impact of Continuous Use and Regular Breaks
Julia Addis began experiencing ear infections in college, a problem that worsened significantly during remote work when she wore earbuds for 7-8 hours daily. The constant occlusion led to irritated ear canals and frequent, painful infections. After consulting with Dr. Elias Michaelides, she implemented a simple but effective strategy: taking 5-10 minute breaks every hour to allow her ears to “breathe.” This change provided immediate relief, allowing her to continue her work without the cycle of infections.
Knowing when to replace your ear pads is key. Look for these clear indicators:
- Tactile Rebound Test: Press down firmly on the foam pad for 5 seconds. New pads rebound quickly, while worn-out pads will remain compressed for a longer time.
- Seal Sound Test: Play a low-frequency bass tone (50-80 Hz). Press the earcups firmly against your head. If you notice a significant increase in bass, it indicates the seal is broken and needs replacement.
- Visual Inspection: Check for any cracking, flaking, or peeling on the surface that exposes the porous inner foam.
- Hygiene Check: Any persistent odor, discoloration, or visible accumulation of oils and sweat that cannot be cleaned is a clear sign that the pads should be replaced. Generally, foam tips should be replaced every 2-3 months of regular use.
Key Takeaways
- Proactive management of moisture and pressure in the ear canal is more effective than reactive cleaning.
- Material choice is critical: memory foam can significantly reduce pressure points and irritation compared to standard silicone tips.
- A strict post-workout protocol of drying earbuds before casing them is essential to prevent corrosive damage and bacterial growth.
The Marketing Trick Behind “Hi-Res Certified” Stickers on Budget Earbuds
When shopping for audio equipment, you’ll often see a “Hi-Res Audio” certification sticker, even on budget-friendly earbuds. This certification simply means the device’s drivers are technically capable of reproducing frequencies beyond the range of normal human hearing (typically above 40kHz). While this sounds impressive, it is often a marketing distraction that says nothing about the most important aspects of audio quality and ear safety: sound tuning, driver quality, and, most importantly, passive isolation.
On many budget models, the “Hi-Res” capability is rendered meaningless by poor construction and, critically, a bad seal. Without good passive isolation from a well-fitting ear tip, low-frequency sounds (bass) leak out, and ambient noise leaks in. To compensate for this, users are forced to turn up the volume to dangerous levels to hear their music over the background noise. This directly increases the risk of Noise-Induced Hearing Loss (NIHL). The irony is that a non-certified earbud with an excellent seal will provide a safer and more satisfying listening experience at a lower volume than a “Hi-Res” certified one with a poor seal.
The focus on an abstract technical specification distracts from the fundamental principle of safe listening. As health experts often state, hearing loss due to earbuds is 100% preventable if you ensure the volume isn’t too loud. A good seal is the first line of defense in keeping the volume low. Therefore, instead of being swayed by a sticker, you should prioritize fit and isolation above all else. A good seal not only protects your hearing by allowing for lower listening volumes but also contributes to better ear health by reducing the need to constantly adjust or push the earbuds deeper into your ear canal, which can cause irritation.
How to Configure “Silent Mode” on Your Headphones for Pure Focus?
Active Noise Cancellation (ANC), or “silent mode,” is a transformative technology for focus and immersion. However, for those wearing headphones for many hours a day, its use should be strategic to promote ear health. The constant seal required for ANC, combined with the technology itself, can sometimes lead to a sensation of pressure or “eardrum suck.” More importantly, it maintains the occluded, humid micro-environment that can contribute to infections. The solution is not to abandon ANC but to use it intelligently, in concert with transparency modes and scheduled breaks.
Transparency mode, which uses external microphones to let you hear your surroundings, is a powerful tool for ear health. Activating it is like opening a window for your ear canals. It breaks the acoustic seal, allowing air to circulate, which helps to reduce moisture and heat buildup. As Dr. Elias Michaelides explains, these breaks are crucial. In his words, “Breaks help air circulate in your ears. They reduce friction too.” By building these “breathing breaks” into your listening routine, you actively disrupt the conditions that foster bacterial growth.
Breaks help air circulate in your ears. They reduce friction too
– Dr. Elias Michaelides, Rush University Medical Center
Building a sustainable listening habit involves more than just managing volume. It’s about actively managing the physical environment of your ear canal throughout the day. This proactive approach is the cornerstone of preventing long-term issues.
- Schedule “Ear Breathing” Breaks: Use transparency mode for five minutes every hour to break the seal and allow air to circulate, even if you continue working.
- Take Full Audio Breaks: Every hour, take the earbuds out completely for 5-10 minutes. Let your ears rest from both sound and physical presence. This is the most effective way to restore a normal ear canal environment.
- Use Lower ANC Levels: If you experience a sensation of pressure, try a lower ANC setting. Most modern headphones offer variable levels. A lower setting can still be effective without feeling as intense.
- Alternate Modes: Switch periodically between ANC and transparency mode throughout the day to prevent constant, uninterrupted occlusion.
By adopting these clinical-grade habits—from choosing the right materials and ensuring a perfect fit to implementing rigorous hygiene and strategic breaks—you can transform your relationship with your earbuds. It’s about moving from a reactive response to pain and infection to a proactive system of care that ensures your devices serve as tools for productivity and enjoyment, not as a source of chronic health issues. Start today by implementing one of these protocols to protect your hearing and your health for the long term.