
The belief that you need professional skills to make gadgets last is a myth perpetuated by manufacturers; the real power lies in understanding their game and making strategic choices.
- Budget devices are often designed to fail, making premium, repairable options cheaper in the long run through a lower Total Cost of Ownership (TCO).
- Manufacturers actively block independent repairs through software locks (“parts pairing”), making repairability a crucial factor to check before you buy.
Recommendation: Shift your focus from a device’s initial price to its repairability score and long-term software support. This is the single most effective way to save money and reduce electronic waste.
It’s a story we all know too well. Your smartphone, once blazing fast, now crawls. Your laptop, a productivity workhorse, now sounds like a jet engine just opening a browser. It often happens, almost comically, just a few months after the warranty expires. The common advice is a familiar chorus: use a protective case, don’t drop it, keep it clean. While not wrong, this advice misses the point entirely. It treats the symptom—wear and tear—while ignoring the disease: a system of planned and perceived obsolescence designed to keep you buying.
You are not clumsy or unlucky. You are a participant in an economic model that profits from short device lifecycles. Manufacturers use a host of tricks, from using cheap components in budget models to actively blocking you from performing simple repairs on premium ones. They’ve convinced us that a two-year lifespan is normal and that complex electronics are beyond our ability to maintain. This is a lie. The truth is, you don’t need to be a technician to fight back. You just need a different strategy.
This guide isn’t about generic cleaning tips. It’s about pulling back the curtain on the industry’s tactics. We’ll dismantle the myth that “budget” means “cheaper” by calculating the true cost over five years. We’ll expose the software locks that turn a simple screen replacement into a nightmare. Most importantly, we’ll arm you with the knowledge to perform strategic, targeted maintenance that prevents failures before they happen and to choose devices that are built to last and be repaired, not replaced. It’s time to reclaim your right to a long-lasting device.
This article provides a complete roadmap to shift from being a passive consumer to an empowered owner. We will explore the hidden economics of device failure and provide concrete, actionable strategies you can use immediately.
Summary: How to Extend the Lifespan of Your Gadgets by 2 Years Without Professional Tools?
- Why Budget Tech Products Fail Just After the Warranty Expires?
- Which Brands Offer the Best Repairability Score for Smartphones Under $500?
- The Error Message That Appears When You Replace a Screen Yourself
- Premium vs. Budget: Which One Actually Costs Less over a 5-Year Period?
- How to Clean Charging Ports Safely to Avoid Fake Charging Issues?
- When to Replace a Battery Before Selling to Increase Your Profit?
- Why You Must Clean Your Laptop Fans Every 6 Months to Maintain FPS?
- How to Time Your Smartphone Upgrade to Save $300 on the Next Model?
Why Budget Tech Products Fail Just After the Warranty Expires?
That feeling of a device failing shortly after its warranty ends is not just bad luck; it’s often a result of a deliberate business model. The budget electronics market, in particular, thrives on a high-volume, short-lifecycle strategy. To hit an attractive low price point, manufacturers make compromises on component quality. This can include using lower-grade batteries that degrade faster, cheaper soldering on the mainboard, or less durable plastics that become brittle over time. These components are engineered to last “just long enough” to survive the typical 12 or 24-month warranty period.
This cycle is perpetuated by consumer behavior, which manufacturers have helped shape. While research from the Consumer Electronics Association found the average smartphone life expectancy was 4.7 years, users upgrade far more frequently. In fact, recent data shows that Americans wait about 2.75 years to replace their phones. This gap between potential lifespan and actual use creates a profitable “churn” for companies. They have little financial incentive to build a $300 phone that lasts for five years when market behavior shows they can sell a new one to the same person in under three.
This isn’t necessarily a conspiracy, but a cold economic calculation. The bill of materials for a budget phone is scrutinized down to the last cent. Opting for a capacitor or memory chip rated for 10,000 hours of use instead of one rated for 30,000 hours saves millions in production costs. For the consumer, this saving translates into a device that works perfectly on day one but is a ticking clock, destined to fail just when you’ve come to depend on it.
Which Brands Offer the Best Repairability Score for Smartphones Under $500?
The single most powerful move you can make against planned obsolescence is to choose devices that are designed to be repaired. A “repairability score,” popularized by organizations like iFixit, is a crucial pre-purchase metric. It evaluates how easy it is to open a device, replace common components like the battery and screen, and find spare parts and manuals. A high score signifies that the manufacturer respects your right to repair; a low score is a major red flag.
While the sub-$500 category is notoriously difficult for repairability, some brands stand out by making it a core part of their philosophy. Fairphone is the undisputed champion, with a modular design that lets you swap out parts with just a simple screwdriver. However, even mainstream brands are feeling the pressure from consumers and regulators. Google and Apple have started offering genuine parts and repair manuals to the public, though their designs can still be challenging. In contrast, other brands continue to use excessive glue and proprietary screws, making even a simple battery swap a high-risk procedure.
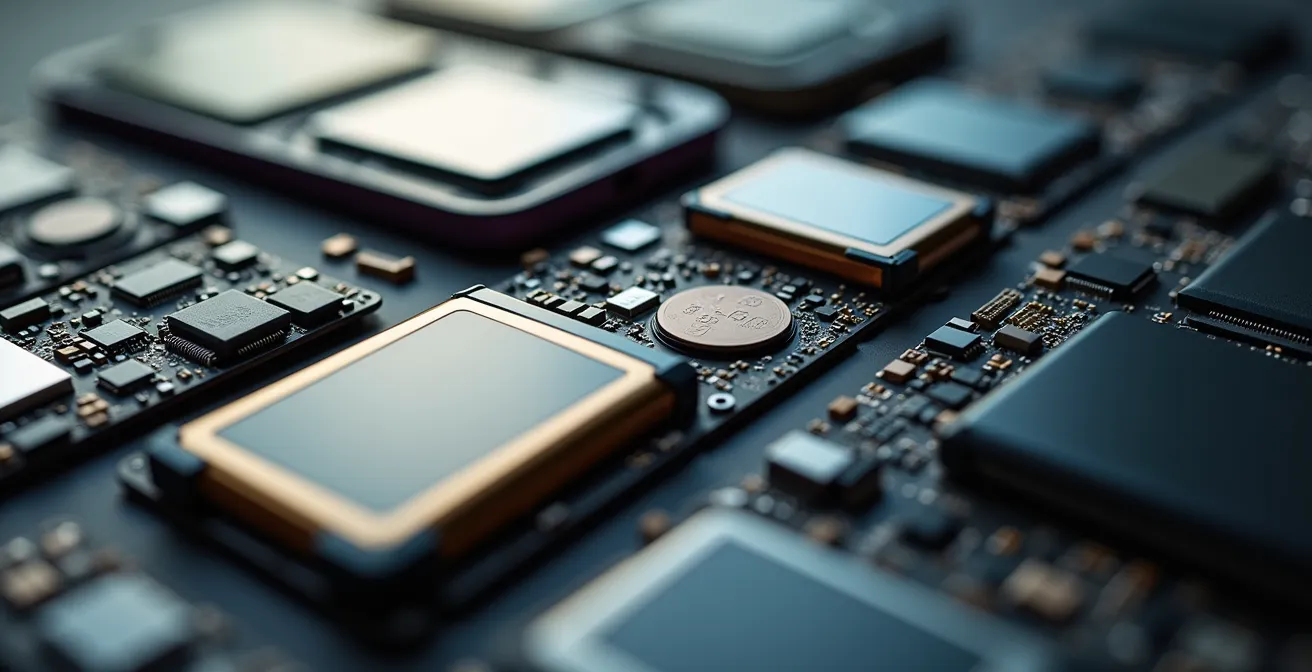
The components you see here—battery, camera module, charging port—are the most common points of failure. On a highly repairable phone, replacing them is a straightforward, low-cost affair. On a poorly designed one, they are effectively non-serviceable, forcing a full device replacement for a minor fault. This difference is everything. In fact, consumer research reveals that the vast majority of French consumers say they would willingly switch from their favorite brand to a more repairable one, a sentiment that is growing globally.
To make an informed choice, consult the data directly before you buy. This table gives an overview of how some popular models stack up, demonstrating the wide gap between the best and the worst performers.
| Brand/Model | Score | Key Features |
|---|---|---|
| Fairphone 5 | 10/10 | Perfect score, modular design, 10 spare parts available |
| Google Pixel 8 | 6/10 | Free service manual, genuine parts available |
| iPhone 15 | 7/10 | Dual-entry design, improved with Repair Assistant |
| Samsung Galaxy S23 | 4/10 | Uses Phillips screws, but heavy adhesive use |
The Error Message That Appears When You Replace a Screen Yourself
You’ve done everything right. You bought a genuine replacement screen for your phone, followed a step-by-step tutorial, and performed a perfect installation. You power it on, only to be greeted by an “Unknown Part” warning or find that critical features like Face ID or True Tone no longer work. This isn’t a mistake on your part. This is “parts pairing”, one of the most insidious tactics used by manufacturers to monopolize repair.
Parts pairing is the practice of using software to serialize components like screens, batteries, and cameras to a device’s unique logic board. When you swap a part, even with an identical, genuine one from another device, the software detects a serial number mismatch and disables functionality or displays persistent, annoying warnings. The only way to “authorize” the new part is with proprietary manufacturer software that is unavailable to the public or independent repair shops. It’s an artificial software barrier designed to force you into the manufacturer’s expensive repair network.
The impact of this practice is devastating for both consumers and the environment. It kills the market for used parts harvesting, turning a perfectly good screen from a water-damaged phone into e-waste. It also stifles independent repair businesses. A stark example is the iPhone 14; iFixit retroactively dropped its score from a promising 7/10 to a dismal 4/10 specifically because of these software roadblocks. Repair professionals reported they were considering leaving the business altogether rather than navigate these artificial obstacles, as the practice of parts pairing becomes more widespread.
This isn’t an isolated issue. It’s a calculated strategy to control the entire lifecycle of a product. By making independent repair unreliable, manufacturers can dictate repair prices and ultimately make it more economically appealing for you to simply buy a new device. Understanding this tactic is crucial because it reveals that the fight for a longer-lasting device isn’t just about hardware durability; it’s also a fight against software sabotage.
Premium vs. Budget: Which One Actually Costs Less over a 5-Year Period?
The sticker price is a powerful illusion. A $400 smartphone seems like a much smarter financial decision than a $900 flagship model. But this initial saving often evaporates over time, leaving you with a higher Total Cost of Ownership (TCO). A premium device, while more expensive upfront, is often built with superior materials, receives longer software support, and retains a significantly higher resale value, making it the more economical choice over a five-year period.
Let’s break it down. A budget phone may only receive two to three years of essential security updates, rendering it insecure and incompatible with new apps long before the hardware fails. In contrast, flagship models from Google, Samsung, and Apple now offer up to seven years of software support, ensuring their usability and security for a much longer time. Furthermore, the resale value of a three-year-old flagship phone is often higher than the resale value of a one-year-old budget phone, which depreciates almost immediately. By repairing instead of replacing, consumers can realize enormous savings; economic research indicates Americans could save $49.6 billion annually just by fixing common household electronics.
When you factor in a likely battery replacement (a common repair) and the final resale value, the math often flips. The premium device, despite its initial cost, ends up costing you less per year of use. Calculating the TCO is the ultimate tool to see past marketing and make a truly informed financial decision.
Your Action Plan: Calculate the 5-Year Total Cost of Ownership
- Calculate Initial Cost: Note the purchase price of both the budget and premium device options you are considering.
- Factor in Repair Costs: Add the estimated cost of one battery replacement (typically under $100) for each device around the 2-3 year mark.
- Assess Software Lifespan: Consider the value of longevity. A device with 7 years of support offers far more long-term value than one with only 4 years. This extends its secure, usable life.
- Project Resale Value: Research the current selling price of 3-year-old models for both the premium and budget lines on marketplaces. Subtract this projected value from your running total.
- Compare Final Costs: The device with the lower final number is the true winner. This is its Total Cost of Ownership.
How to Clean Charging Ports Safely to Avoid Fake Charging Issues?
One of the most common reasons a phone stops charging properly has nothing to do with a faulty battery or a broken cable. It’s often something much simpler: a charging port clogged with lint, dust, and debris. This build-up prevents the charging cable from making a solid connection, leading to intermittent charging, slow charging, or what feels like a complete failure. Before you spend money on a new battery or a repair service, performing this simple, two-minute cleaning procedure can save you time and money.
The key to cleaning the port is to be gentle and use the right tools. Never use metal objects like paperclips or pins, as they can scratch the sensitive contact pins inside the port and cause a short circuit. The goal is to carefully scrape and dislodge the compacted debris, not to aggressively scrub the inside. As experts from Techlicious point out, this is a frequent point of failure:
The charging port is one common area that attracts dirt that could compromise device operation. If you keep your phone in your pocket, the charging port can become clogged by lint.
– Techlicious, How to Extend the Life of Your Phone
Here is a safe and effective method to clean your ports and grilles without causing damage:
- Power Off Completely: Before you insert anything into the port, always shut down your device to prevent any risk of electrical shorts.
- Use a Non-Metallic Tool: A wooden or plastic toothpick is the ideal tool. Gently insert it into the port and carefully scrape along the inner walls to loosen and scoop out compacted lint. You will be surprised at how much can come out.
- Brush Away Debris: For speaker and microphone grilles, use a soft-bristled brush (like a clean, soft toothbrush) at an angle to gently flick away any dust or debris.
- Use Compressed Air Sparingly: If stubborn debris remains, a short burst of compressed air can help. Hold the can upright and spray from a distance to avoid forcing moisture into the device.
- Clean Your Case: Often, the source of the lint is the case itself. Clean it separately and allow both the phone and case to dry completely before reassembly.
This simple act of maintenance is a perfect example of how a small, proactive step can prevent a perceived catastrophic failure. It empowers you to solve a problem yourself, for free, that many would pay a repair shop to fix.
When to Replace a Battery Before Selling to Increase Your Profit?
Thinking of your device’s battery not as a consumable but as a feature that affects its value is a major strategic shift. A phone with a degraded battery is a liability; a phone with a brand-new battery is a premium product on the second-hand market. The key is to identify the “value-inflection point”—the moment when a small investment in a new battery yields the biggest increase in your device’s resale price.
For most modern smartphones, this point is when the battery’s maximum capacity drops to around 80% of its original design capacity. According to Apple’s own specifications, this is the threshold where performance management features may kick in, and it’s a number that savvy buyers look for. Selling a phone with 95% battery health might not fetch a much higher price than one at 85%, but selling one with a fresh 100% capacity versus one lingering at 79% can make a significant difference, often far more than the cost of the repair.
The economics are compelling. A professional battery replacement often costs under $100. On a popular flagship model, that investment can increase the resale value by $150 or more, netting you a clear profit. You’re not just fixing the phone for the next owner; you’re making a calculated financial decision. You’re selling them a “like-new” performance guarantee, which is a powerful marketing tool. This strategy turns maintenance from a cost into a profit center.
This is especially true for iPhones, where battery health is easily accessible in the settings and has become a standard check for second-hand buyers. As Apple themselves state, their batteries are designed to retain up to 80% of their original capacity after 500 complete charge cycles. Hitting this mark is the perfect trigger to consider a replacement before listing the device for sale. It transforms your device from “used” to “refurbished by owner.”
Key Takeaways
- Planned obsolescence is an economic strategy, not an accident. Budget devices are often built to fail, while software locks can sabotage repairs on premium ones.
- Total Cost of Ownership (TCO) is a more accurate measure of value than sticker price. A repairable, premium device with long software support is often cheaper over 5 years.
- Simple, targeted maintenance you can do yourself (like cleaning ports and fans) can prevent major failures and extend your device’s high-performance lifespan.
Why You Must Clean Your Laptop Fans Every 6 Months to Maintain FPS?
If your gaming or high-performance laptop has started to stutter, drop frames (FPS), or feel sluggish, your first instinct might be to blame software bloat or an aging graphics card. However, the most likely culprit is far simpler and cheaper to fix: dust. Over time, laptop fans and heatsinks become clogged with dust, which acts as an insulator, trapping heat. This leads to a phenomenon called thermal throttling.
Thermal throttling is a self-preservation mechanism. When your CPU or GPU gets too hot, the system automatically reduces their clock speed (and thus their performance) to prevent permanent damage. This is “strategic degradation” in action. The hardware is still perfectly capable, but it’s being intentionally held back by its own cooling inefficiency. A 10-20% drop in performance can often be traced directly back to a clogged cooling system. Cleaning your fans is not just about maintenance; it’s about reclaiming the full performance you paid for.
Instead of adhering to a rigid “every 6 months” schedule, a more effective approach is condition-based maintenance. You can use free software like Core Temp or HWMonitor to establish your laptop’s baseline idle temperature when it’s new or freshly cleaned. When you see that idle temperature consistently rise by 10°C or more, it’s time for a cleaning, regardless of how much time has passed. This proactive monitoring ensures you act when it’s needed.
A Strategic Cleaning Guide
- Monitor Temperatures: Establish a baseline idle temperature for your CPU/GPU when the laptop is clean.
- Clean When Necessary: When idle temps rise by 10°C from your baseline, or if you see temps hitting 90°C+ under load, it’s time to clean.
- Use Compressed Air: Power off and unplug the laptop. Use short bursts of compressed air to blow dust out of the intake and exhaust vents. Aim to make the fans spin briefly to dislodge packed-in dust.
- Consider Thermal Paste: For laptops over three years old that still run hot after a cleaning, the thermal paste between the processor and the heatsink may have dried out. Replacing it is a more advanced repair but can dramatically improve cooling performance.
How to Time Your Smartphone Upgrade to Save $300 on the Next Model?
Extending the life of your device is the primary goal, but eventually, you will upgrade. Timing this upgrade strategically—both when you sell your old device and when you buy your new one—can save you hundreds of dollars. The market for smartphones follows a predictable annual cycle, and playing it wisely is the final step in mastering the economics of your gadgets.
The worst time to sell your old phone is right after its successor is announced. The moment a new model is revealed, the perceived value of the previous generation plummets as the market is flooded with other upgraders. The optimal time to sell is approximately one to two months *before* the new model is expected to be announced. During this window, demand is still high, and the upcoming release isn’t yet cannibalizing your phone’s value. You can capture its maximum residual price.
Conversely, the best time to buy is often right after a new model launches. This creates two opportunities. First, the price of the *previous* generation model, still a fantastic and highly capable device, will see official price drops and carrier discounts. You get a nearly-new phone for a fraction of its original cost. Second, if you do want the latest model, waiting a month or two after the initial launch rush can help you avoid stock shortages and take advantage of the first minor sales or bundled promotions. This patient approach prevents you from paying the “early adopter tax” and ensures you get the most value for your money.
By combining these two strategies—selling high before a launch and buying low after a launch—you effectively create your own subsidy for your next device. This isn’t about chasing the latest technology the second it comes out. It’s about detaching from the marketing hype and treating your upgrade as a calculated financial transaction, maximizing the asset you have and minimizing the cost of the asset you’re acquiring.
Start applying these principles today. Check your device’s battery health, research its repairability score, and schedule a time to clean its ports and fans. Taking control of your technology’s lifecycle is not only a smart financial move but a powerful statement against a wasteful consumer culture.